Tech is Easy
Mole for Mac: Install (Brew or curl) and Free Up Storage
Mole is a free, open-source tool that cleans junk off your Mac: caches, logs, leftovers from apps you already deleted, and other files you never use. It runs in the Terminal, but you only need to type a couple of commands. On my MacBook it freed up over 30 GB in about two minutes.
What you need
- A Mac running macOS 12 or newer (Intel or Apple Silicon)
- The Terminal app (press Cmd + Space, type Terminal, press Enter)
Before you start
- Check how full your disk is. Apple's guide to freeing up storage space on Mac shows where to look: on macOS Ventura 13 or later, open System Settings > General > Storage. On older versions, choose About This Mac from the Apple menu and click Storage. Note the free space so you can compare after cleaning.
- Know what Mole deletes for good. According to the Mole README,
mo cleandeletes permanently rather than moving files to the Trash, and it empties your Trash by default. Take anything you still want out of the Trash first. - Close big apps. Browsers and developer tools that are open keep using their caches, so Mole may skip them (it shows a "skipped" reason). Closing them first lets it clear more.
- Only download Mole from the real places. The developer says Mole is distributed only through Homebrew, the GitHub repository and mole.fit. Sites like molemac.com, moleapp.net and molefit.com are not Mole.
1Check the project on GitHub (optional)
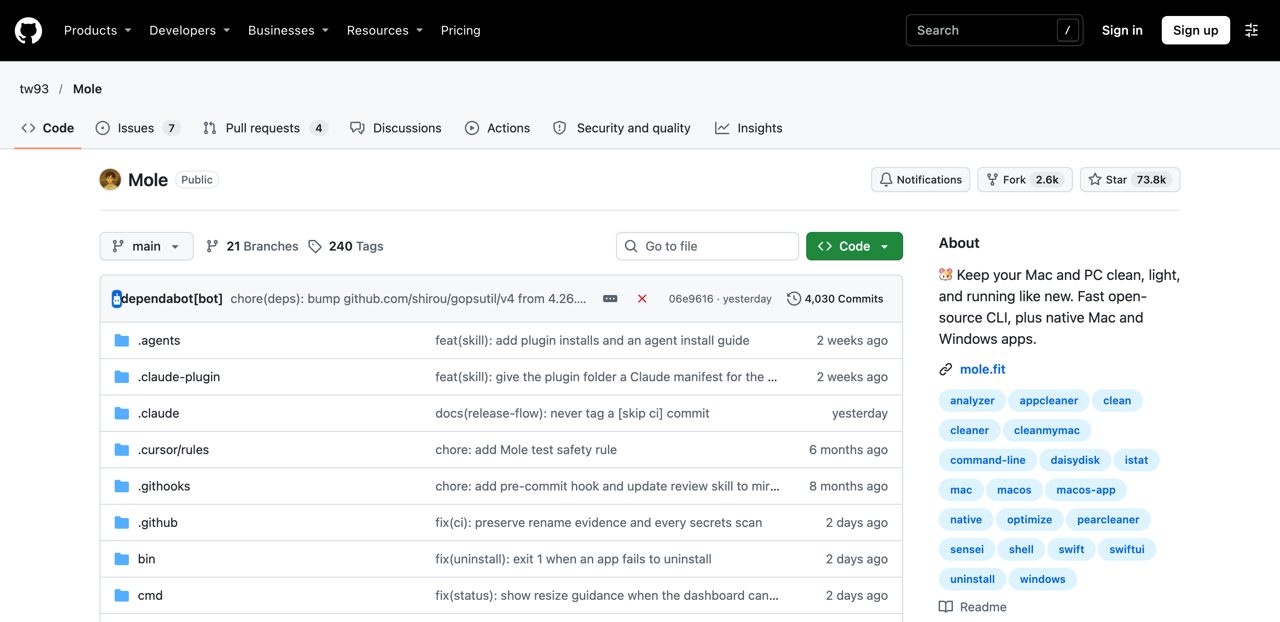
Mole is made by tw93 and is public on GitHub at github.com/tw93/Mole, with over 70,000 stars. It is free and open source under the GPL-3.0 license, so anyone can see exactly what it does.
2Install Mole with one command
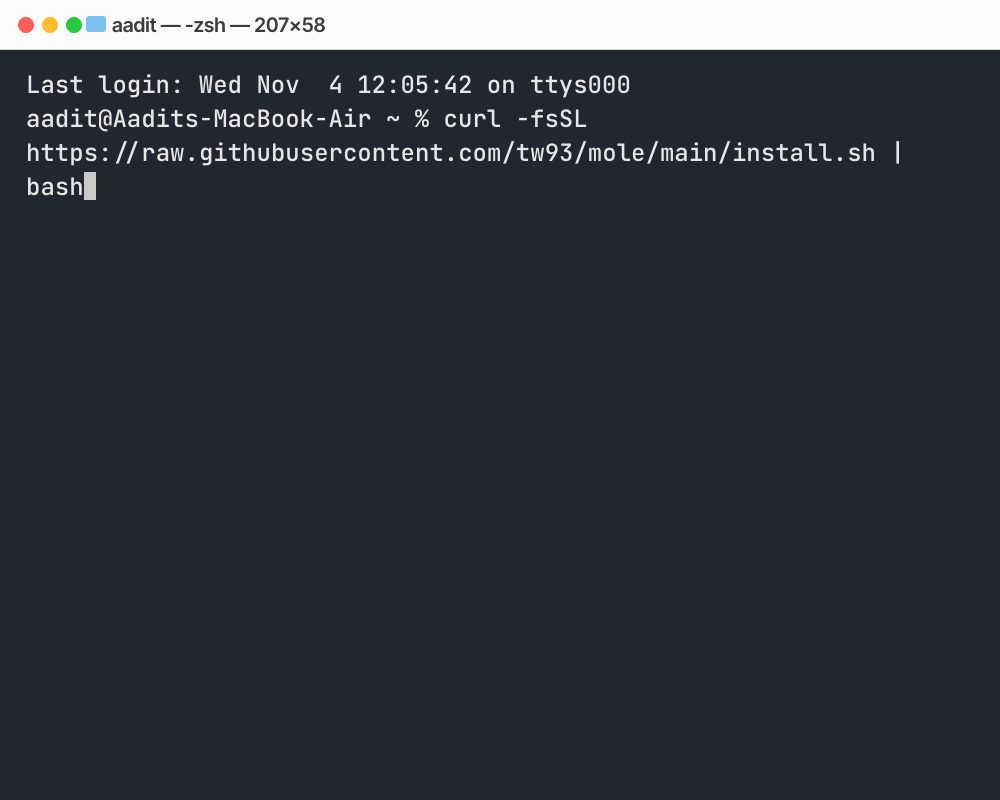
Open Terminal, paste this command and press Enter:
curl -fsSL https://raw.githubusercontent.com/tw93/mole/main/install.sh | bash
If it asks for your password, type your Mac login password (nothing shows while you type, that is normal) and press Enter.
If you use Homebrew, brew install mole works too.
3Wait for the install to finish
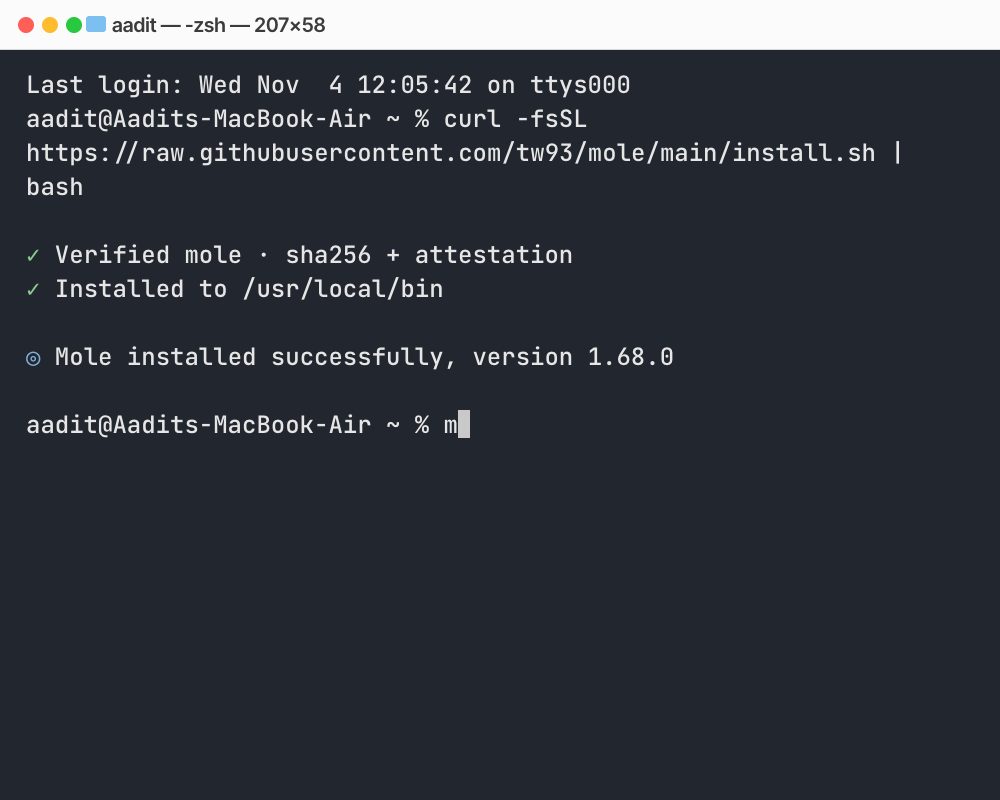
In a few seconds you will see Mole installed successfully along with the version number.
4Open Mole and choose Clean
Type mo and press Enter. A menu opens. Clean is already highlighted, so just press Enter again.
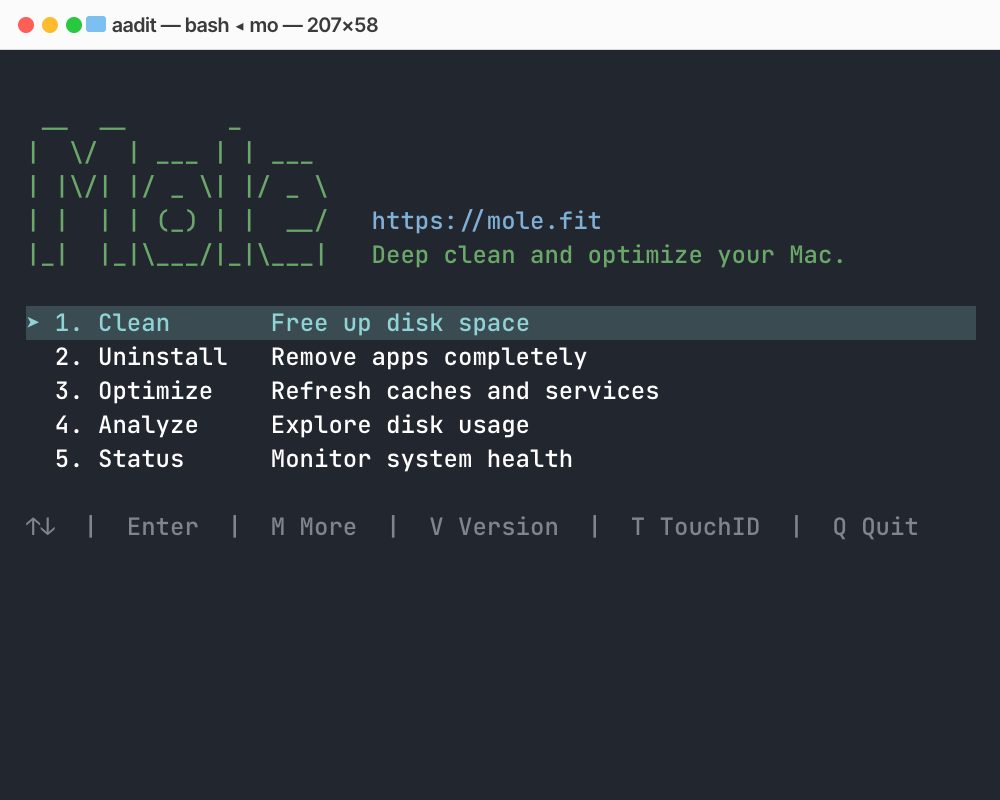
You can also skip the menu and type mo clean directly.
5Check the report
Mole scans your Mac, removes the junk it finds and shows a report of how much space it freed. The whole thing usually takes a minute or two.
What Mole cleans (and what it doesn't)
mo clean goes through known-safe locations: app caches, app logs, browser caches (Safari, Chrome and others), temporary files, developer caches such as npm, and leftovers from apps you have already removed. The report groups them under headings like User essentials, App caches, Browsers and Developer tools, with the size of each.
It does not touch your documents, photos, music or the apps you still use. Caches it removes are rebuilt by apps as needed, so a browser may load sites a little slower the first time after cleaning, and some apps may take a moment longer to open once.
Other Mole commands worth knowing
mo analyzeopens a visual disk explorer so you can find the large folders and files Mole won't remove for you, like old videos or downloads.mo installerfinds leftover installer files (.dmg and .pkg) you no longer need.mo purgecleans build folders from coding projects, useful if you are a developer.mo updateupdates Mole to the latest version.mo clean --whitelistlets you pick caches to protect, including the Trash if you don't want Mole to empty it.
Tips / troubleshooting
- Want to see what will be removed first? Run
mo clean --dry-run. It lists everything without deleting anything. mo uninstallremoves an app along with its leftover files, andmo analyzeshows what is taking up space on your disk.- If you see command not found: mo, close Terminal and open it again, then try once more.
- Don't run Mole with
sudo. The README says to run it normally; it asks for your administrator password only when a step needs it. - If the curl install asks for a password, that is because it installs into /usr/local/bin. Use the Homebrew install if you would rather avoid that.
- If
brew install molefails on an older macOS, the README suggests using the curl script install instead. - Mac still nearly full after cleaning? Mole only removes junk. Apple's guide suggests moving your Photos library to an external drive, deleting old iPhone backups and clearing your Downloads folder, which often frees far more space.
- Prefer a normal app over Terminal? The same developer makes a separate Mac app at mole.fit.
Related guides: How to Clear Gmail Storage and Free Up Space (Step-by-Step) and How to Clean Up Your Gmail Inbox Fast (Step-by-Step).
FAQ
Is Mole safe to use on a Mac?
Mole is open source with over 70,000 stars on GitHub, so its code is public and widely used. It cleans caches, logs and leftovers rather than your documents or photos. If you want to be careful, run mo clean --dry-run first to see the list before anything is deleted.
Is Mole free?
Yes. The Mole command line tool is completely free and open source. The developer also sells a separate native Mac app, but you do not need it for anything in this guide.
How do I uninstall Mole?
Type mo remove in Terminal and press Enter. If you installed it with Homebrew, run brew uninstall mole instead.
How much storage will Mole free up?
It depends on how long you have used your Mac and which apps you use. Macs with a lot of browser, Xcode or app caches often get back tens of gigabytes. On my Mac it was over 30 GB.
Can I undo a Mole clean?
Not for mo clean. It deletes caches and logs permanently instead of moving them to the Trash, which is why running mo clean --dry-run first is a good habit. Since these are mostly caches, apps simply recreate what they need.
Does Mole work on Windows or Linux?
The steps here are for the Mac version. The developer also keeps separate Windows and Linux versions of the command line tool on the same GitHub project, with their own install commands.
Related guides