Tech is Easy
How to Convert PowerPoint to Video (With Audio and Camera)
Want to turn your slides into a video you can upload or share? This guide shows how to convert PowerPoint to video with your own voice and webcam. You record the slideshow inside PowerPoint, then export it as a video file. No extra software is needed.
What you need
- The PowerPoint desktop app on a Windows PC
- A microphone, and a webcam if you want your face in the corner of the slides
Note: these screenshots are from an earlier version of PowerPoint. Newer versions may lay out the recording window a little differently, but the Record tab and File > Export > Create a Video work the same way.
1Open the Record tab
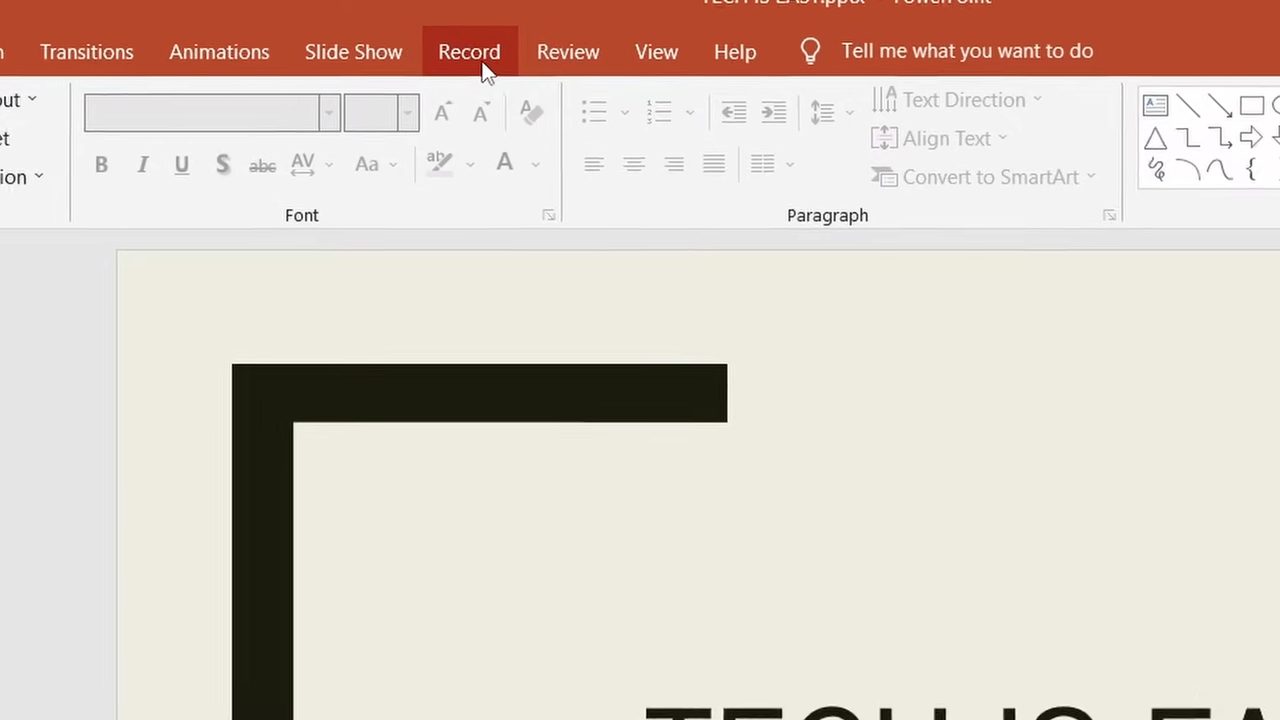
Open your presentation and click the Record tab at the top. If you don't see it, open the Slide Show tab instead, which also has a Record option.
2Click the Record button
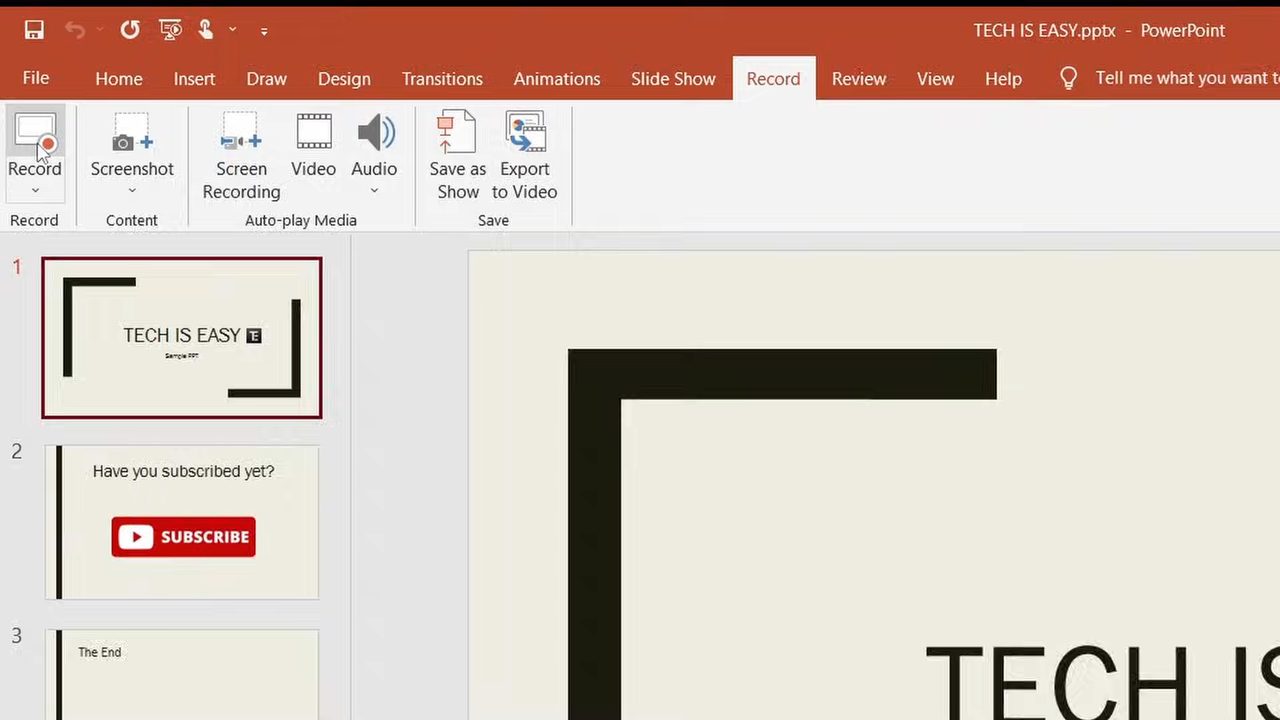
Click Record, the first button on the left of the Record tab. PowerPoint opens the recording window.
3Turn on your mic and camera
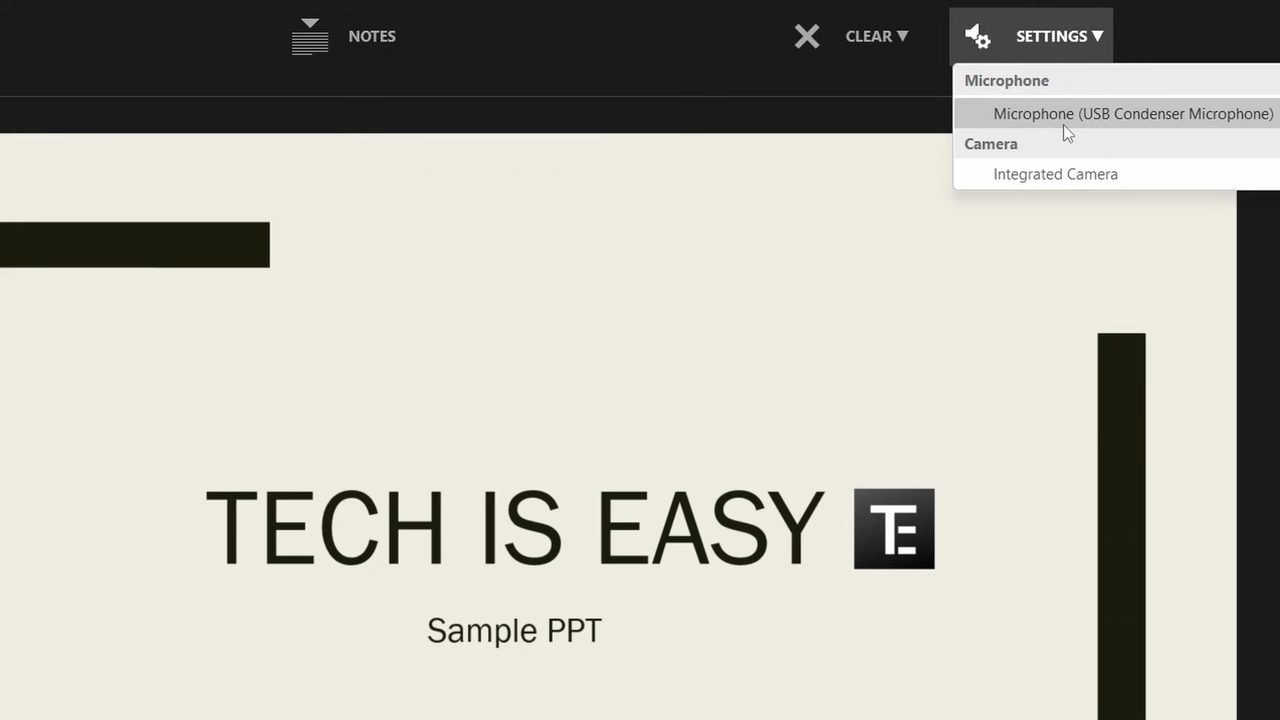
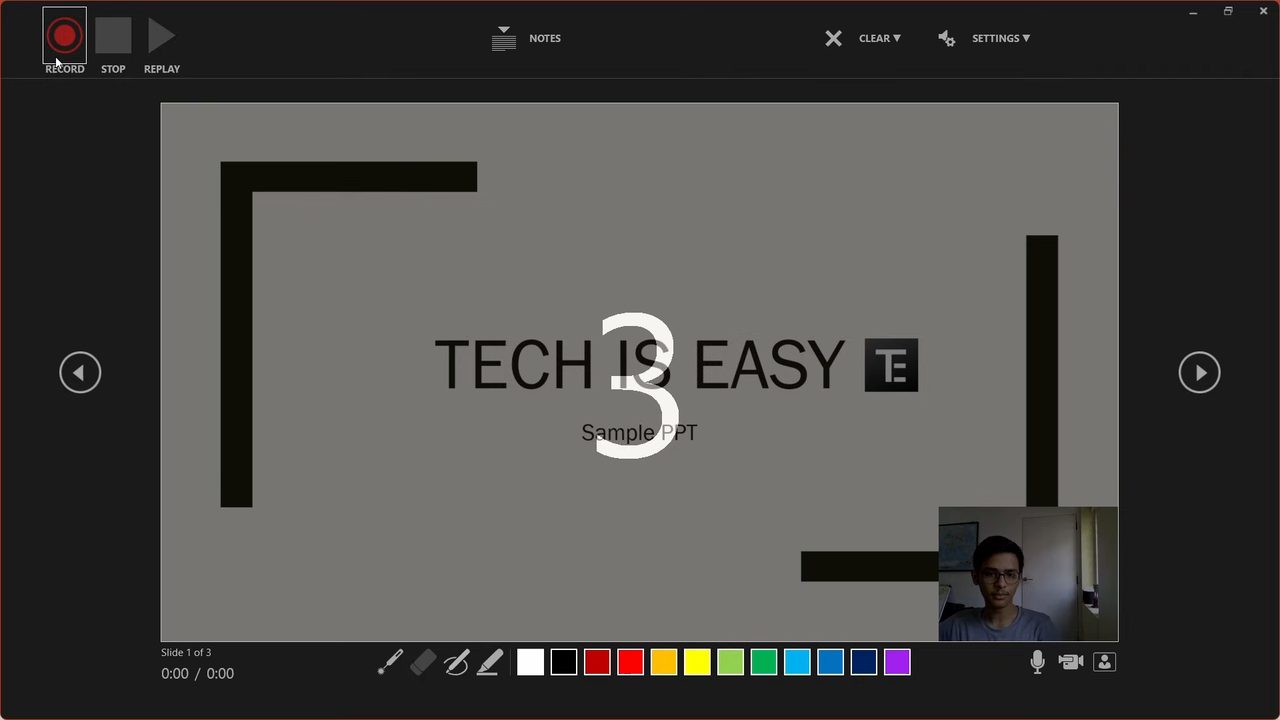
At the bottom right of the recording window, click the microphone and camera buttons to switch them on. Your webcam preview appears in the bottom right corner of the slide. To pick a different microphone or camera, click Settings at the top and choose from the list.
4Start recording
Click the red Record button at the top left. A 3-second countdown appears, then PowerPoint starts recording your voice and camera.
5Present and draw on your slides
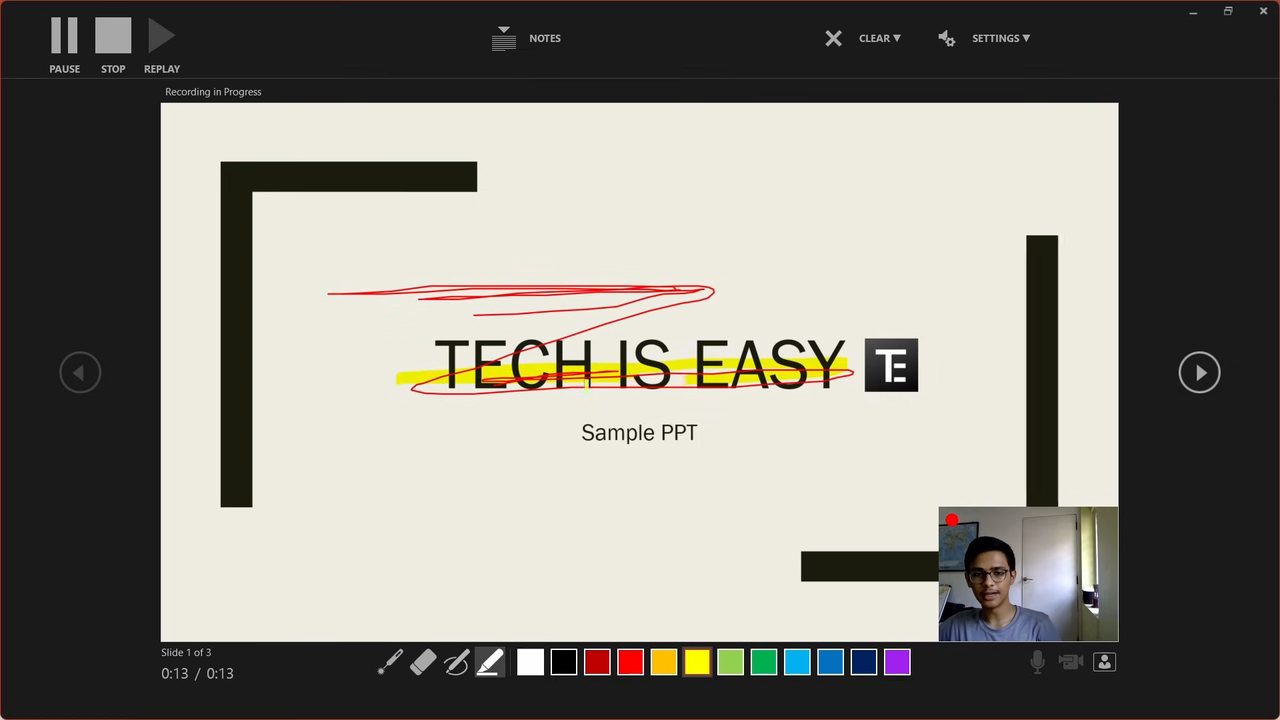
Talk through your slides as you normally would. The tools at the bottom let you use a laser pointer, draw with a pen, use a highlighter and erase. Pick a colour from the palette next to them. Click the arrow on the right to move to the next slide.
6Use your notes while recording
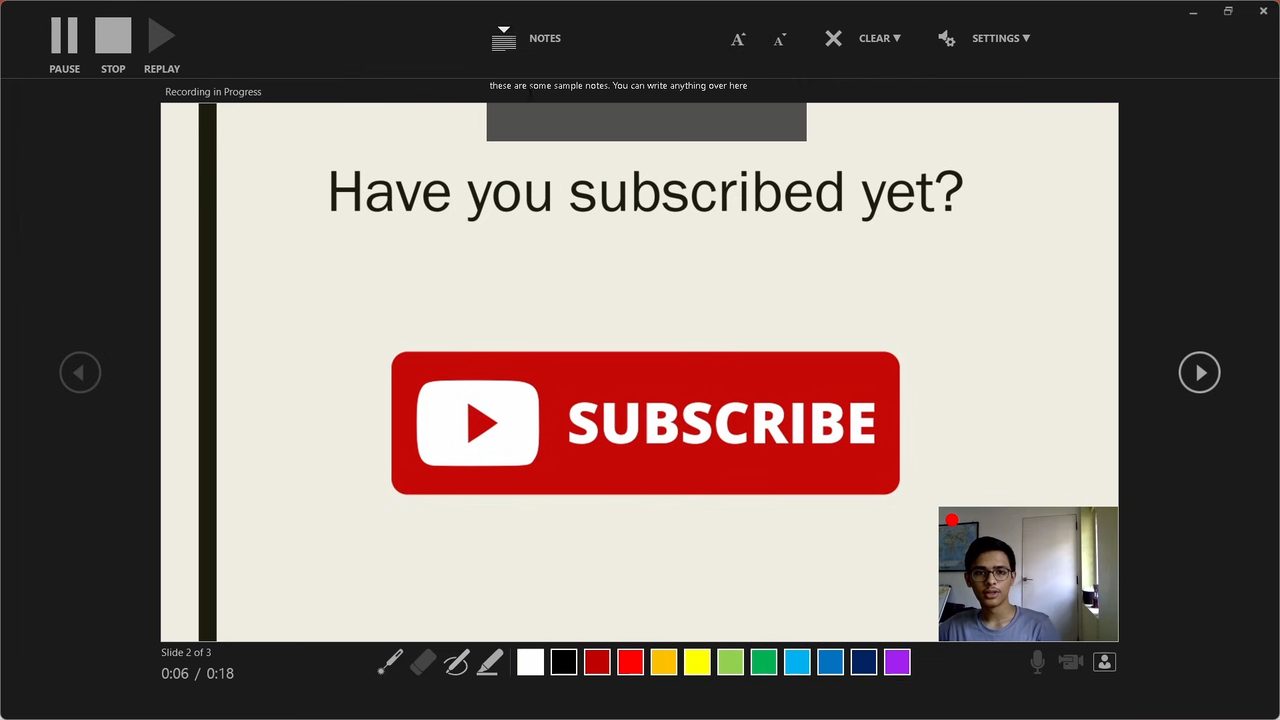
Click Notes at the top to show the speaker notes for the current slide. You can read from them while you talk, and they won't appear in the final video.
7Stop the recording
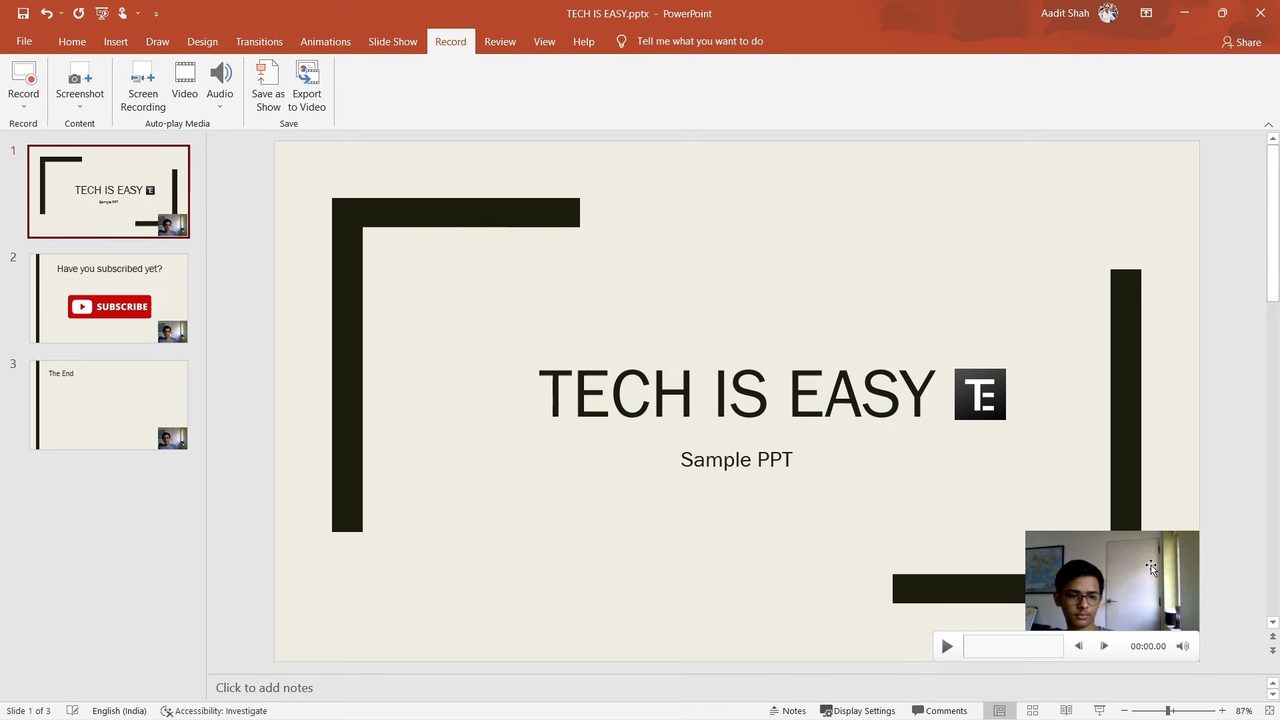
When you are finished, click Stop (you can also Pause if you need a break). Close the recording window. Each slide now has your recorded camera video and audio on it.
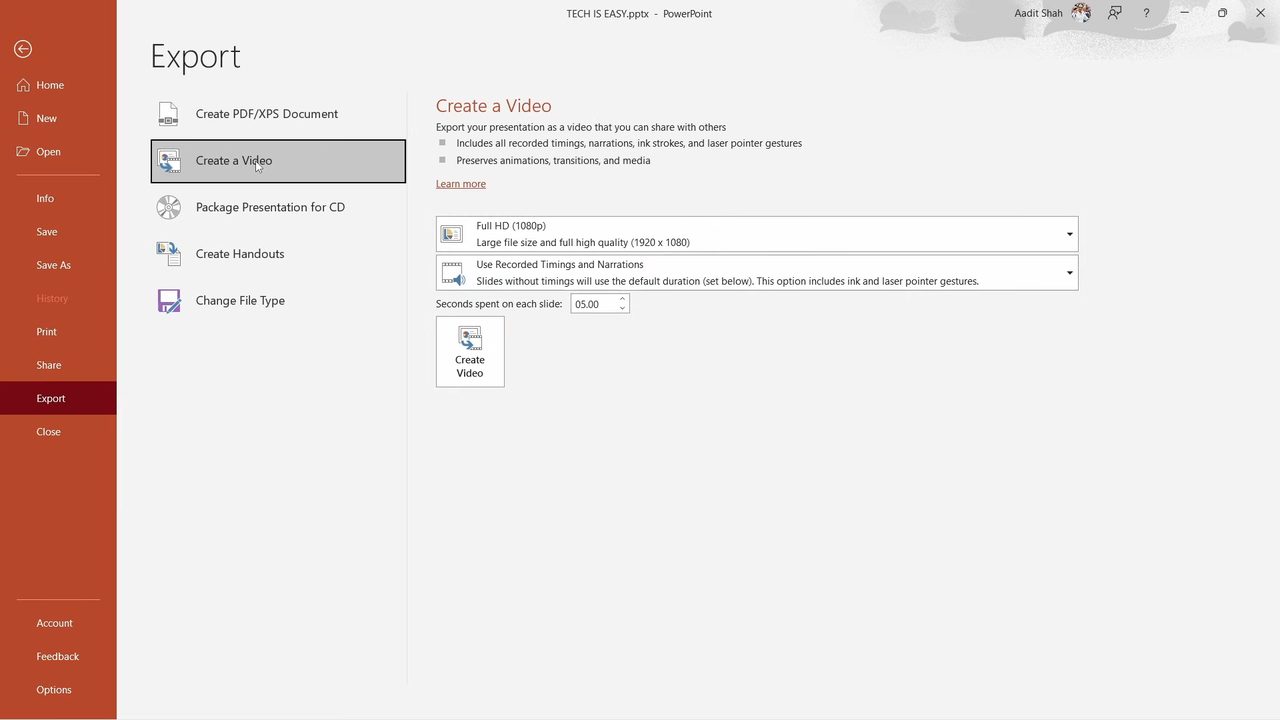
8Go to File > Export > Create a Video
Click File, then Export, then Create a Video.
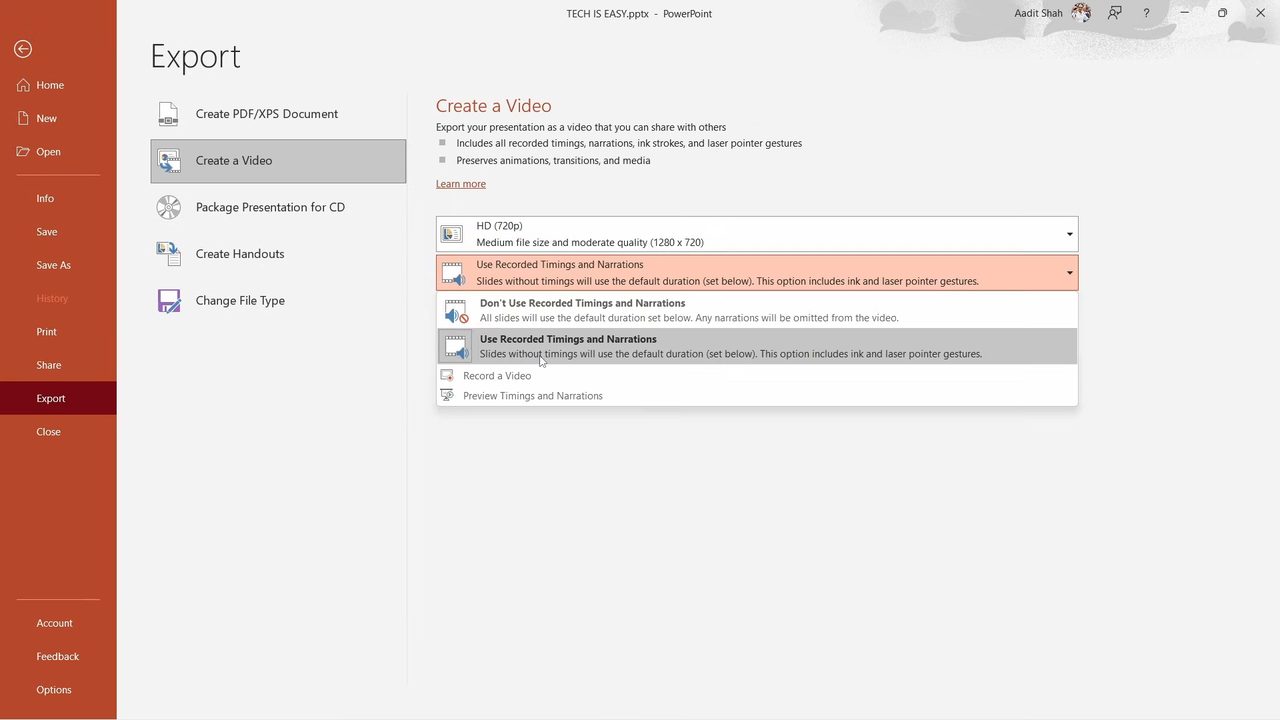
9Choose the quality and timings
In the first dropdown pick a resolution: Ultra HD (4K), Full HD (1080p), HD (720p) or Standard (480p). We used HD (720p). In the second dropdown choose Use Recorded Timings and Narrations so your voice, camera and drawings are included.
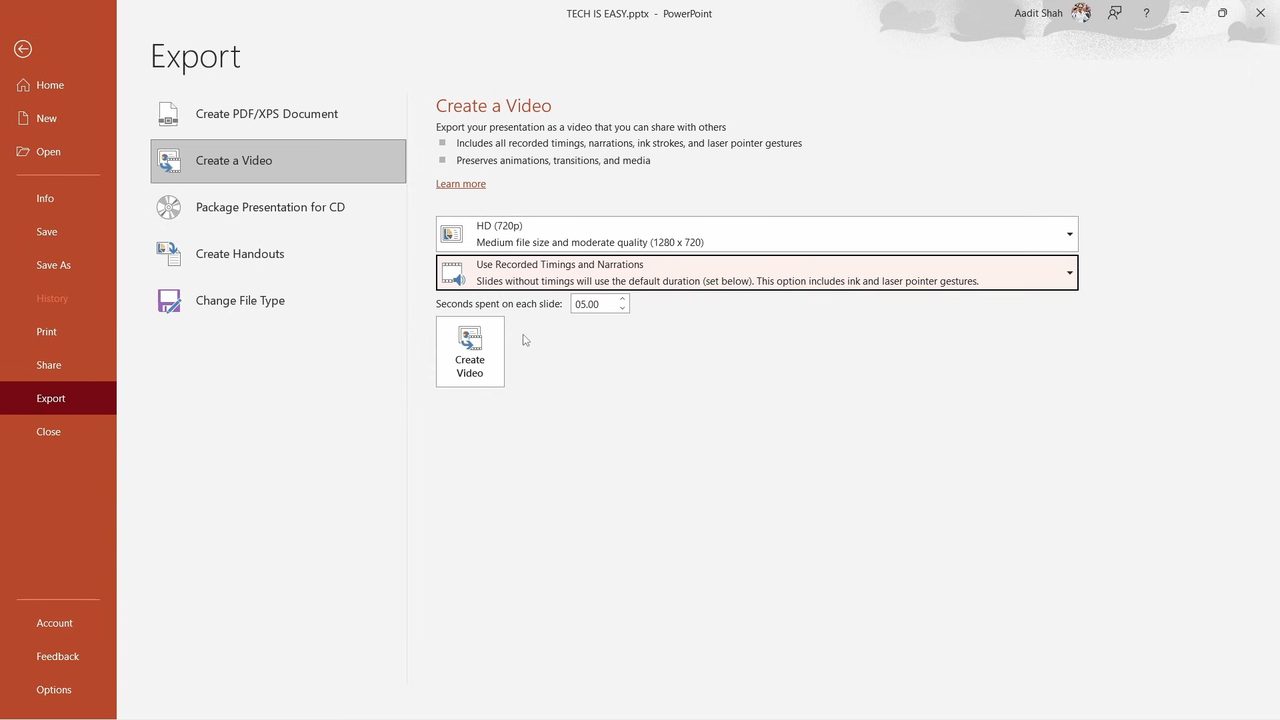
10Create and save the video
Click Create Video, choose where to save the file and click Save. PowerPoint shows the export progress in the status bar at the bottom. When it finishes, open the file to check it. Ours was a 45-second video with both audio and camera.
Tips / troubleshooting
- If the video has no sound, go back and check that Use Recorded Timings and Narrations is selected, not Don't Use Recorded Timings and Narrations.
- Higher resolutions give sharper video but larger files and longer export times. 720p or 1080p is enough for most uses.
Related guides: How to Insert a YouTube Video in PowerPoint (Step-by-Step).
FAQ
Can I convert PowerPoint to video without recording my voice?
Yes. Go to File > Export > Create a Video and choose Don't Use Recorded Timings and Narrations. Each slide then shows for the number of seconds set in Seconds spent on each slide.
What format does PowerPoint save the video in?
PowerPoint saves the video as an MP4 file by default, which plays on almost any device and can be uploaded to YouTube.
Will my speaker notes show up in the video?
No. Notes are only visible to you in the recording window, so you can read from them without them appearing in the exported video.
Why is the export taking so long?
Exporting renders every slide, animation and recording into a video, so longer presentations and higher resolutions take more time. Leave PowerPoint open until the progress bar at the bottom finishes.
Related guides