Tech is Easy
How to Limit Google Form Responses and Close It Automatically
To limit Google Form responses, install the free formLimiter add-on, open Add-ons > formLimiter > Set limit, choose number of form responses or date and time, enter your limit and click Save and enable. The form then closes automatically once it hits that number or that deadline. This is handy for event sign-ups with limited seats, quizzes with a deadline, or any form you don't want to keep open forever.
This tutorial was recorded in 2021, so the Google Forms menus may look slightly different now. Google has also since added its own response limit and close date setting, covered further down.
What you need
- A Google Form you can edit
- A computer with a web browser (the add-on runs in the desktop editor)
Method 1: Install formLimiter
1Open the add-ons menu
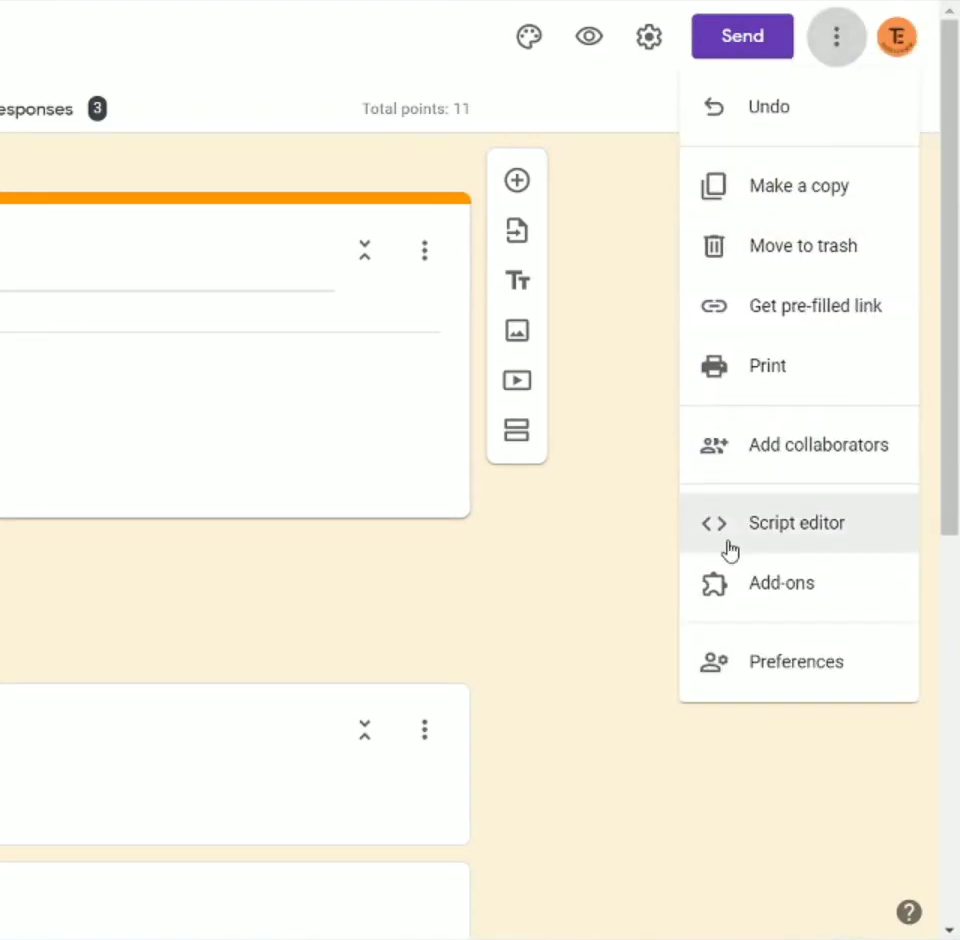
Open your form in edit mode, click the three dots (More) at the top right and choose Add-ons. In newer versions of Google Forms the add-ons button is the puzzle-piece icon next to the palette icon at the top.
2Install formLimiter
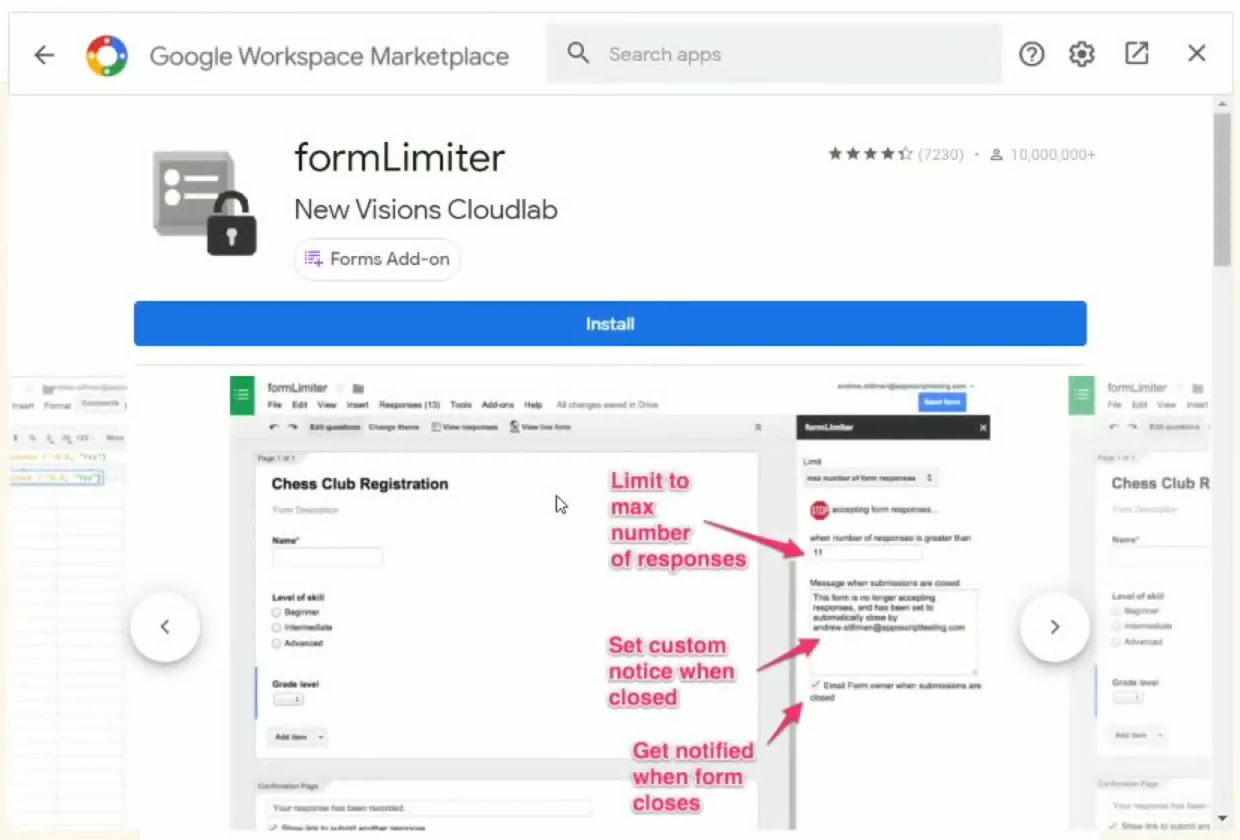
The Google Workspace Marketplace opens inside the form. Click formLimiter by New Visions Cloudlab and then Install. The add-on page lists what it can do: limit the maximum number of responses, show a custom message when the form is closed, close the form at a specific date and time, and close it based on a value in a linked Google Sheet.
Click Continue, pick your Google account and click Allow to give the add-on the permissions it asks for. When you see formLimiter has been installed!, close the window.
Method 2: Close the form after a number of responses
3Choose the limit type
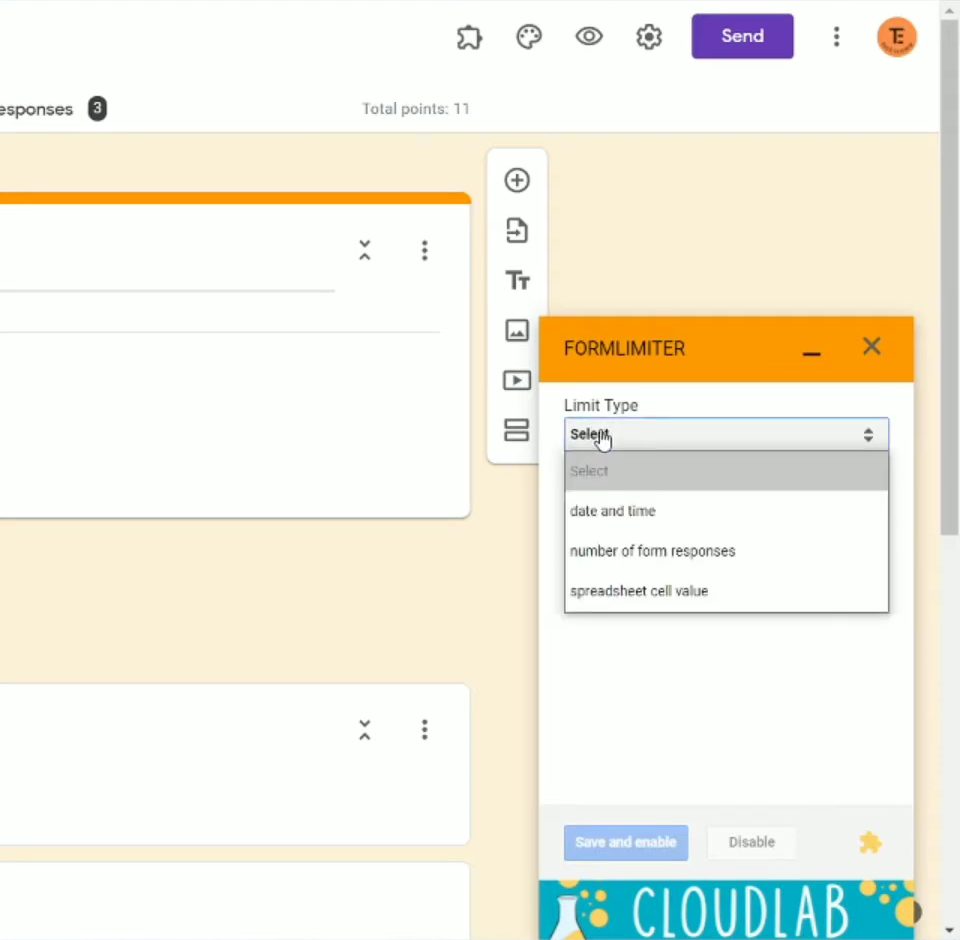
A formLimiter panel opens at the bottom right of the form. Open the Limit Type dropdown. You get three choices: date and time, number of form responses and spreadsheet cell value. Pick number of form responses.
4Enter the maximum and save
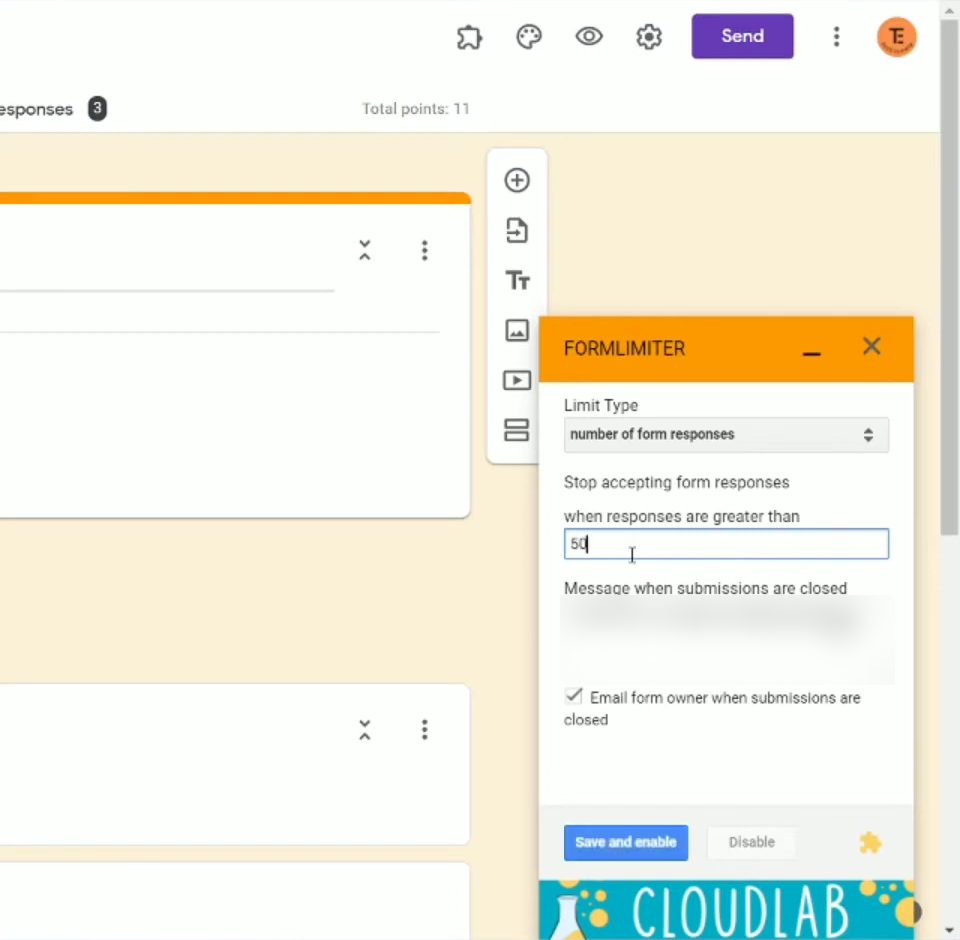
In the box under when responses are greater than, type your limit. If you enter 50, the form stops accepting responses once the 50th person submits it. Edit the Message when submissions are closed if you want a custom note, keep Email form owner when submissions are closed ticked if you want an alert, then click Save and enable.
5Change the limit later
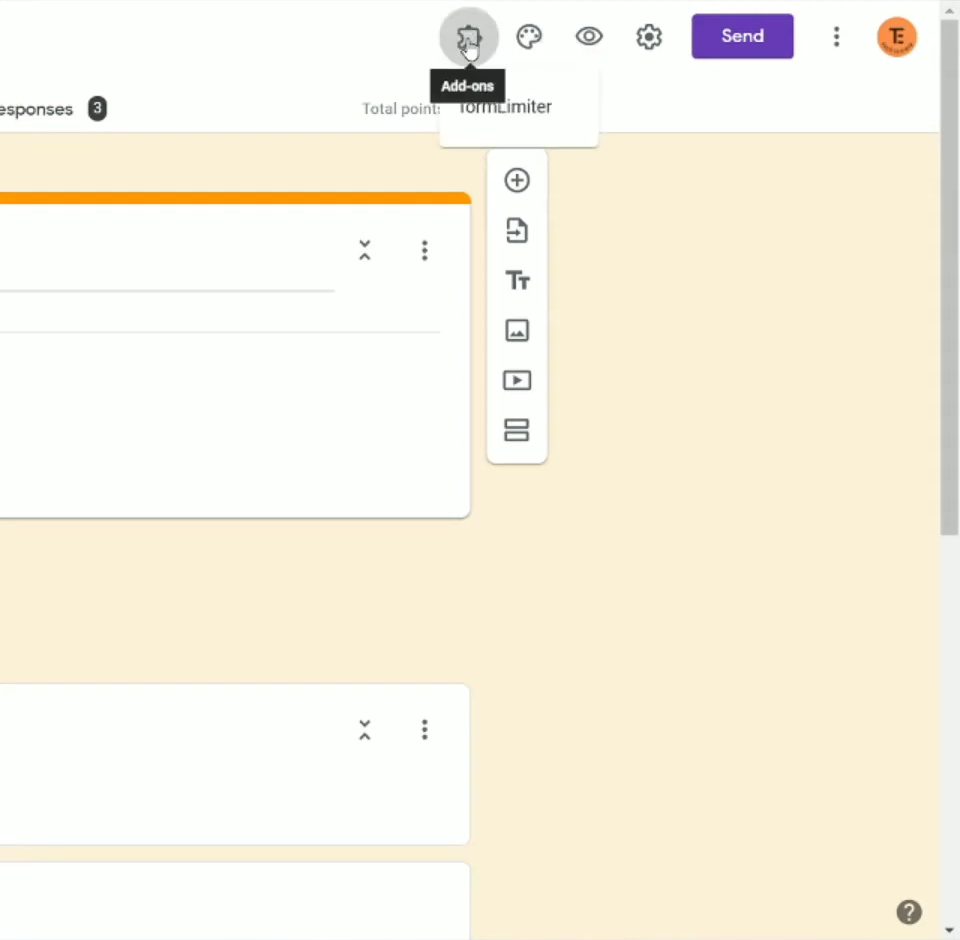
To raise or lower the limit (say from 50 to 70), click the Add-ons (puzzle-piece) icon at the top of the form and choose formLimiter.
6Click Set limit
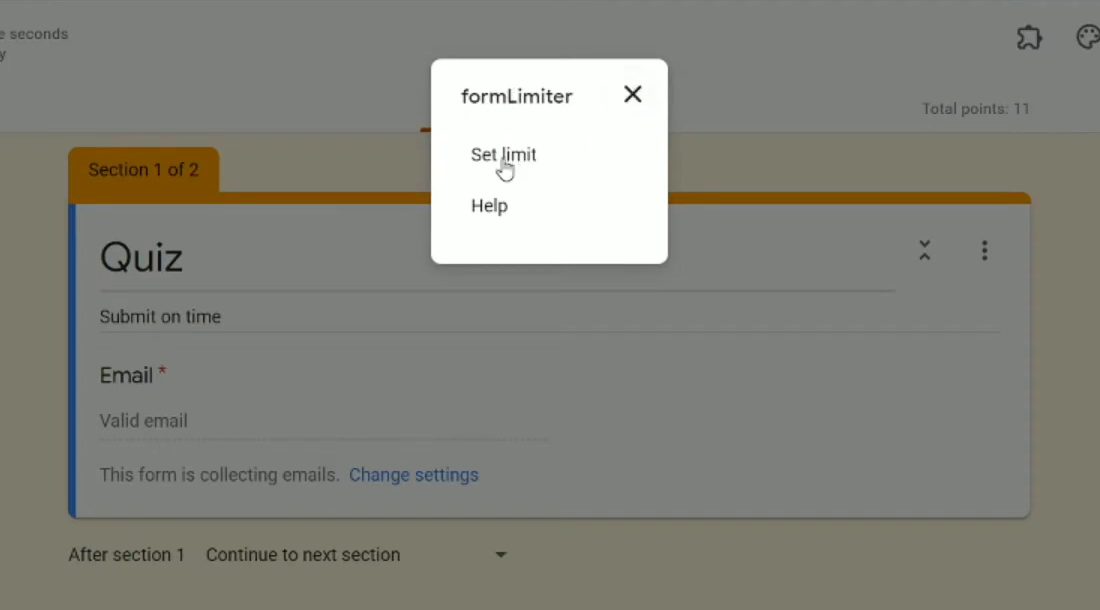
In the small formLimiter menu, click Set limit. The same panel opens again with your current settings. Change the number and click Save and enable again.
Method 3: Close the form automatically on a date and time
7Pick the closing date
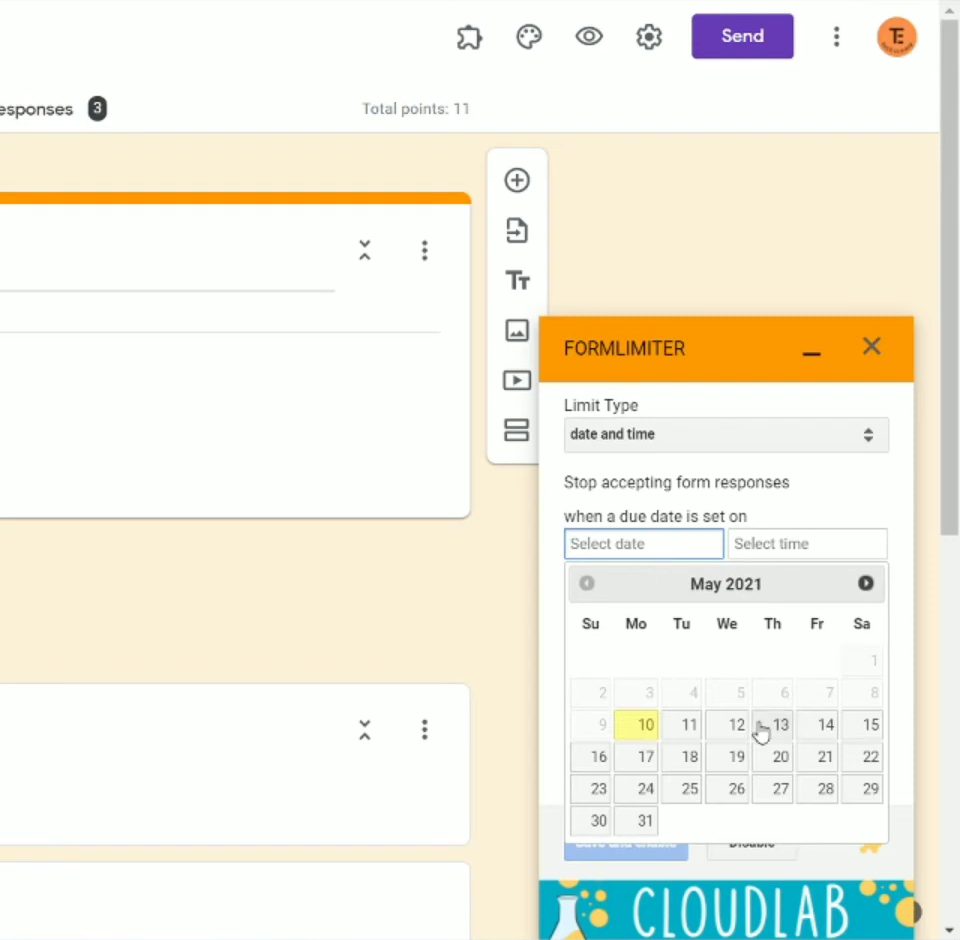
Open Add-ons > formLimiter > Set limit again and change Limit Type to date and time. The panel now says Stop accepting form responses when a due date is set on. Click Select date and choose the day you want the form to close.
8Pick the time and save
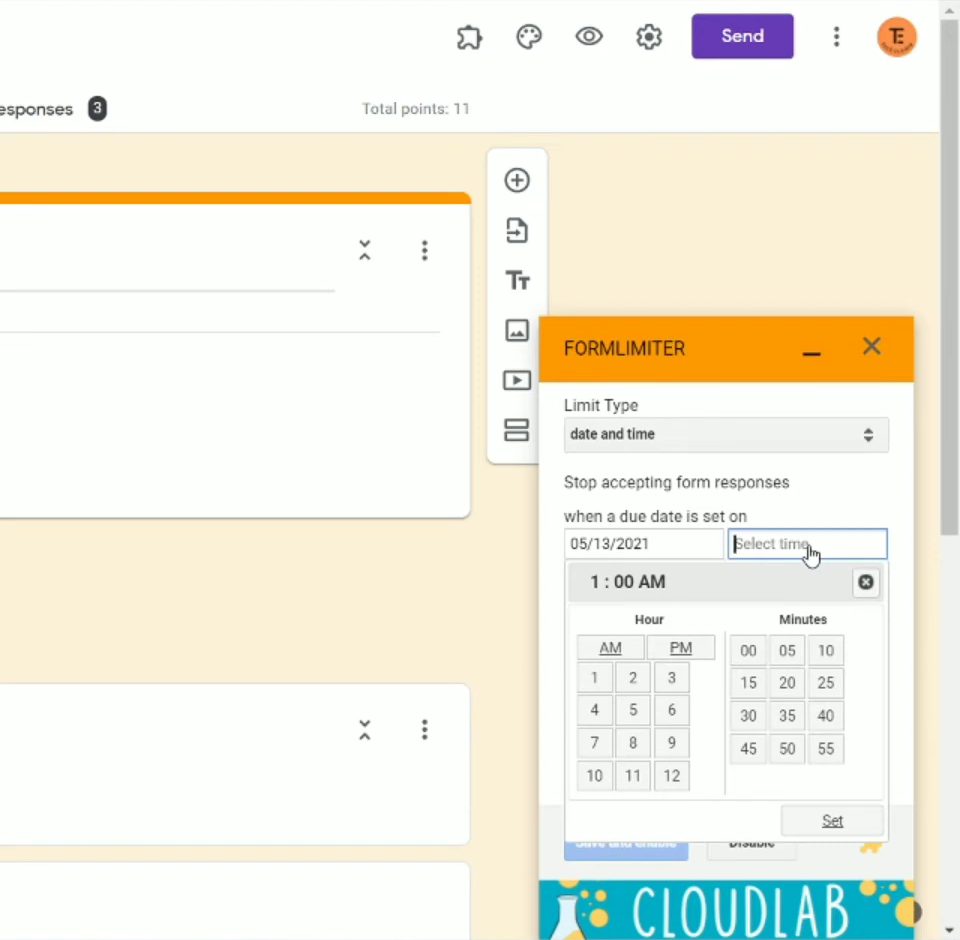
Click Select time, choose the hour, AM or PM, and the minutes, then click Set. In our example the form was set to close on 13 May at 12 PM. Add a closing message or email alert the same way as before and click Save and enable.
9Check that the form closes
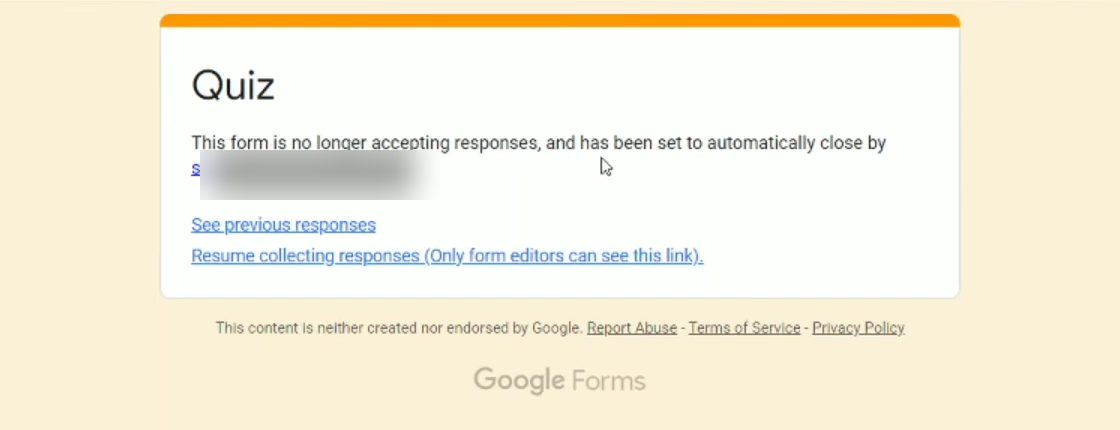
To test it, we set the closing time one minute ahead, waited, and opened the form link from a different Google account. Instead of the questions, it showed This form is no longer accepting responses, and has been set to automatically close by followed by the owner's email. Everyone who opens the form after the deadline, or after the response limit is reached, sees this message.
Newer option: Google's built-in close date and response limit
Google Forms can now do this without an add-on. According to Google's help page View & manage form responses, you click Published at the top right of a published form and, under Accepting responses, click Set close date or response limit. There you can choose a date and time under On a date, or select After a number of responses and type the maximum. You can also edit the message people see when the form is closed. To change it later, click Manage, or Remove Expiration to take the limit off. This isn't shown in the video, so follow Google's page if your screen differs.
Tips / troubleshooting
- Can't find Add-ons? In the current editor, look for the puzzle-piece icon at the top of the form, or open More (three dots) and click Add-ons, which is the path Google's add-on help page gives.
- The new limit is refused. Google notes that if a form already has responses, the limit you enter must be greater than the number already received. So a form with 60 responses can't be capped at 50.
- A few extra responses got through. Google also says that when several people submit at exactly the same moment, the form may accept them even past the limit. Leave a small margin if seats are strict.
- Reopen a closed form. The closed message includes a Resume collecting responses link that only form editors can see. You can also turn Accepting responses back on (in the Responses tab of older editors, or under Published in the current one, as Google's page describes).
- Stop it right now. If you just want to close the form immediately, turn off Accepting responses. No add-on is needed.
Want more control over who can respond? See our guide to Google Forms settings, or browse other useful Google Forms add-ons.
FAQ
How do I limit the number of responses in Google Forms?
Install formLimiter, open Add-ons > formLimiter > Set limit, choose number of form responses, type the maximum and click Save and enable. Google Forms also has a built-in After a number of responses option under Set close date or response limit.
How do I close a Google Form automatically after some days?
In formLimiter, set Limit Type to date and time, pick the date and time and click Save and enable. The form stops accepting responses at that moment without you doing anything.
Can I reopen the form after it closes?
Yes. Open the form and turn Accepting responses back on, or use the Resume collecting responses link shown to editors on the closed form. If the add-on limit is still active, raise the limit or move the date first, otherwise it will close again.
Is formLimiter free?
The video installs it from the Google Workspace Marketplace without paying anything, and all the options shown here worked on a regular Google account.
Related guides