Tech is Easy
5 Google Forms Tricks: Add a Timer, Limit Responses and More
These Google Forms tricks cover five things most people don't know a form can do: send every response to a Google Sheet or a PDF, stop accepting responses after a set number, show different questions based on someone's answer, add a timer to a quiz and grade answers automatically. Two of them use free add-ons (formLimiter and Quilgo), and the rest are built into Google Forms. They are handy for teachers, event organizers and anyone running surveys.
This tutorial was recorded in 2021, so some menus in Google Forms and in the add-ons may look slightly different now. The options themselves still work the same way.
Trick 1: Organize your responses
1Link responses to a Google Sheet
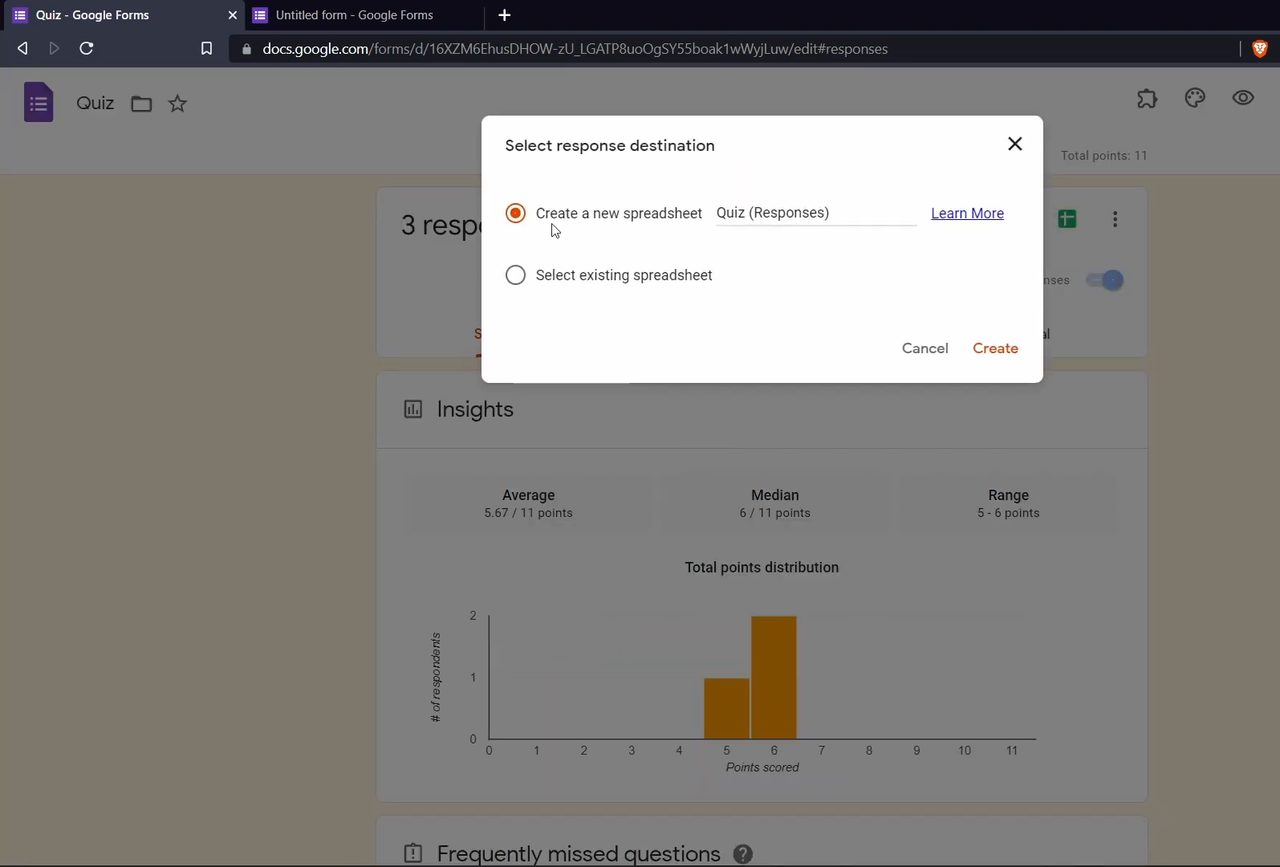
Open your form and go to the Responses tab. Click the green Create Spreadsheet icon. In Select response destination, choose Create a new spreadsheet (you can rename it) or Select existing spreadsheet, then click Create. Each response lands in its own row with a timestamp, email, score and answers, so you can sort, filter or copy a column of emails.
2Save all responses as a PDF
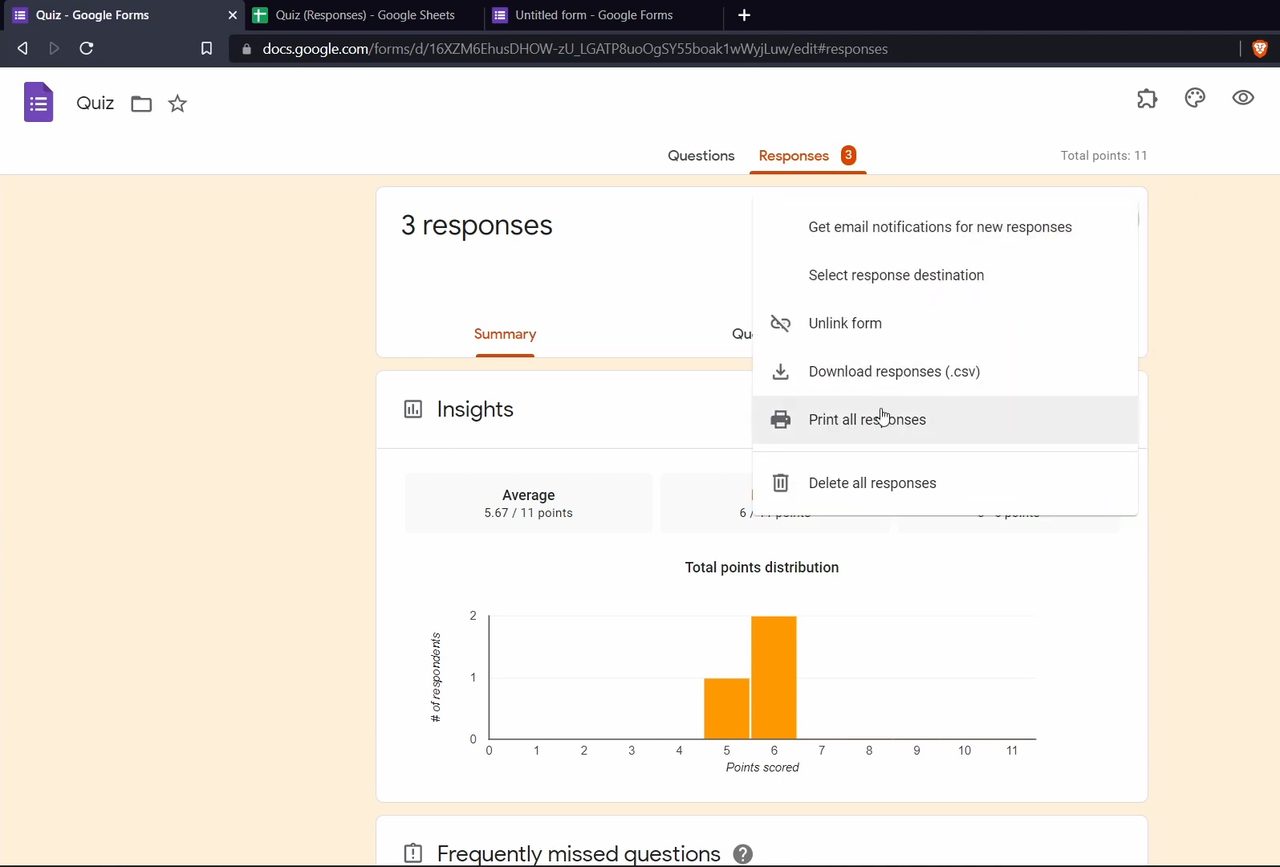
Still on the Responses tab, click the three dots next to the Sheets icon and choose Print all responses. Set Destination to a PDF printer (such as Save as PDF or Microsoft Print to PDF) and save the file.
Trick 2: Limit the number of responses
3Install the formLimiter add-on
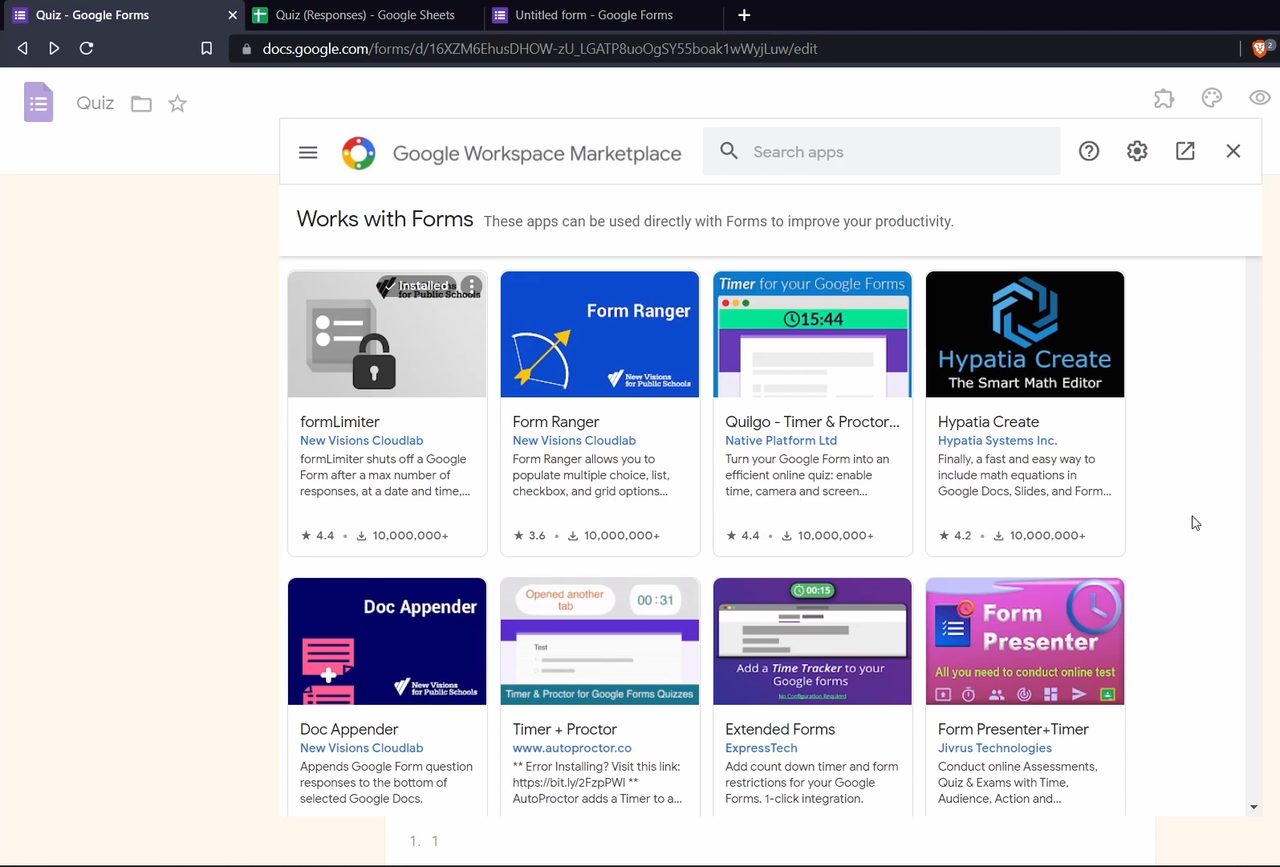
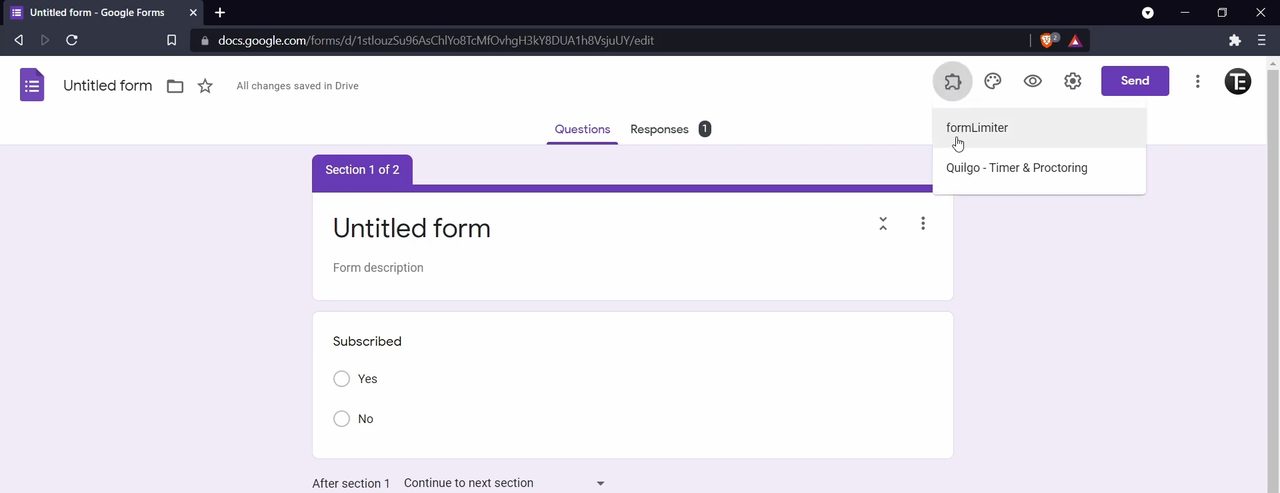
Click the three dots at the top right of the form editor and choose Add-ons. In Google Workspace Marketplace, find formLimiter, click Install, click Continue and allow the permissions it asks for.
4Set the limit and save
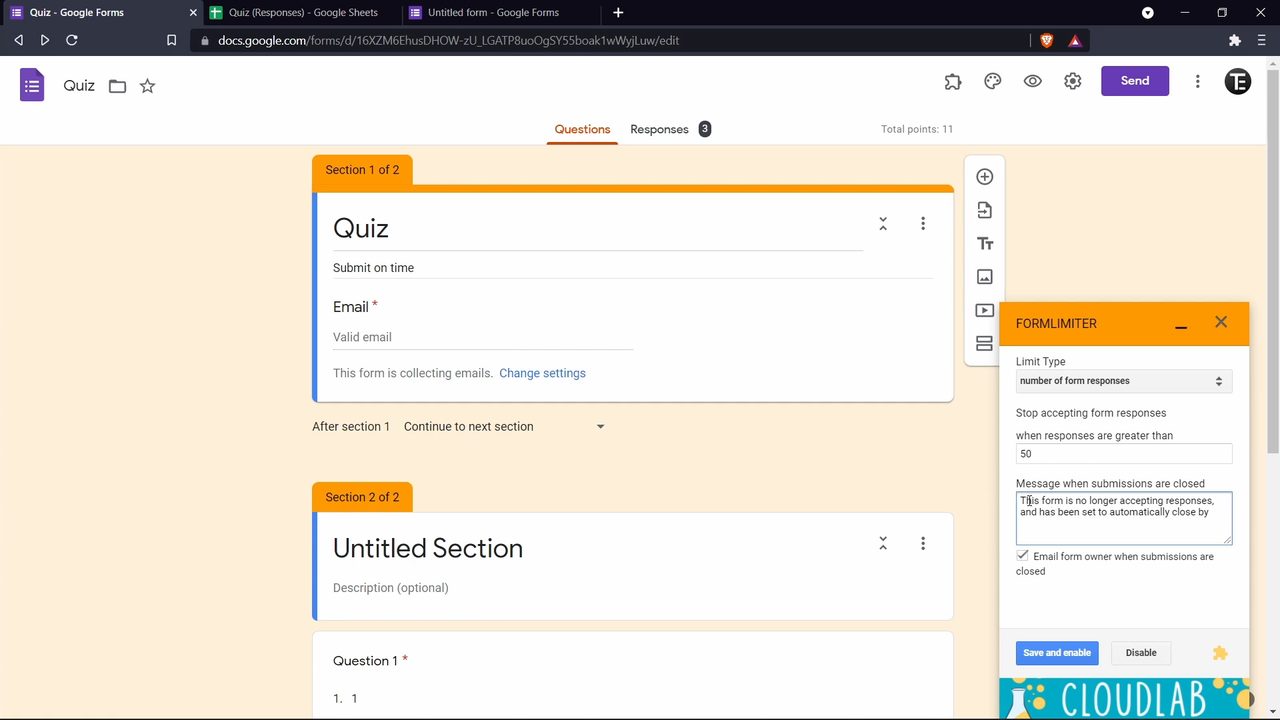
Back in the form, click the Add-ons (puzzle piece) icon at the top, choose formLimiter and click Set limit. If Set limit doesn't show up, reload the page and try again. A panel opens at the bottom right. Under Limit Type pick number of form responses, enter the number (for example 50) under when responses are greater than, and edit the message people see once the form closes. Tick Email form owner when submissions are closed if you want an alert, then click Save and enable. You can also choose date and time as the limit type to close the form at a set deadline.
Trick 3: Show questions based on answers
5Add a section
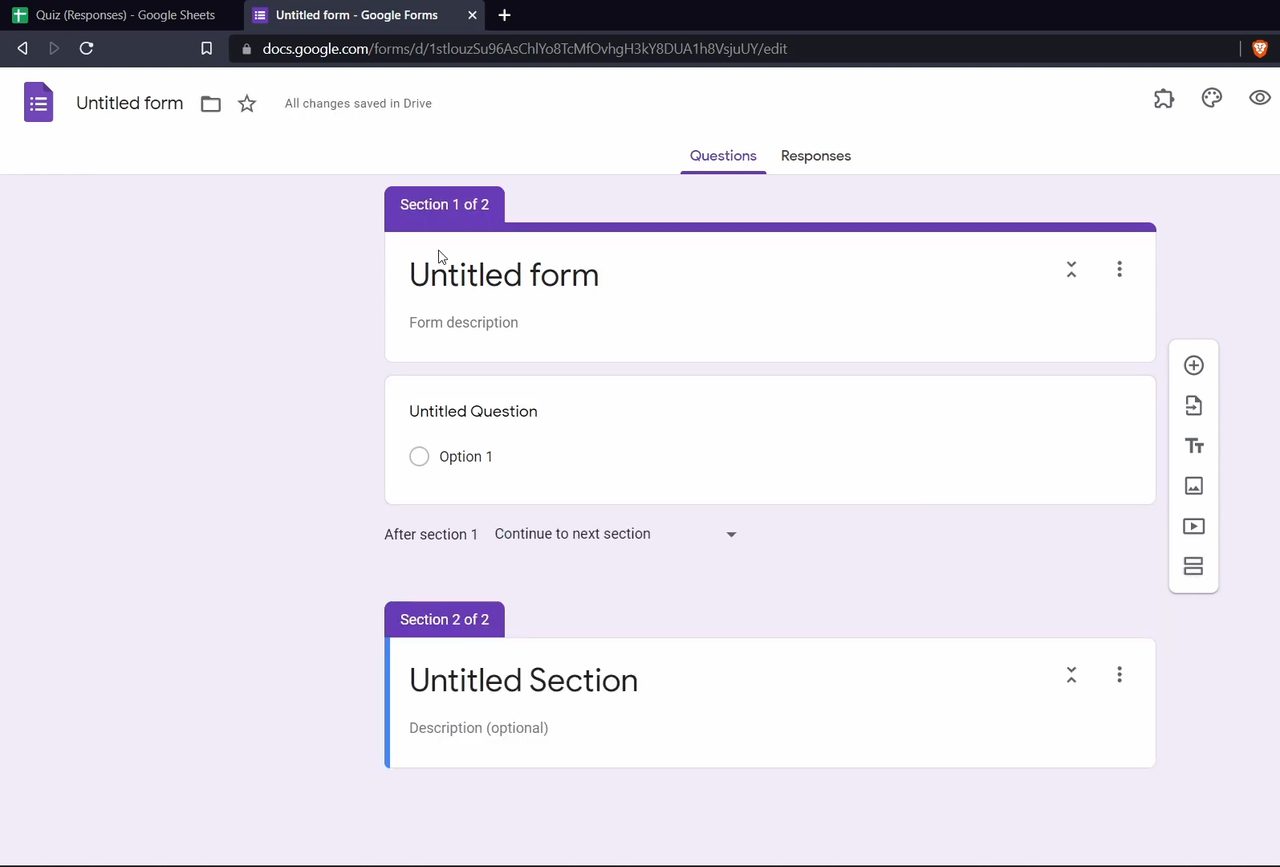
In the form editor, click the Add section icon (the last icon in the floating toolbar on the right). Your form is now split into Section 1 of 2 and Section 2 of 2. Add a multiple choice question to section 1 (in our example "Subscribed" with Yes and No) and a follow-up question to section 2 (for example "Reason", set to Paragraph).
6Choose go to section based on answer
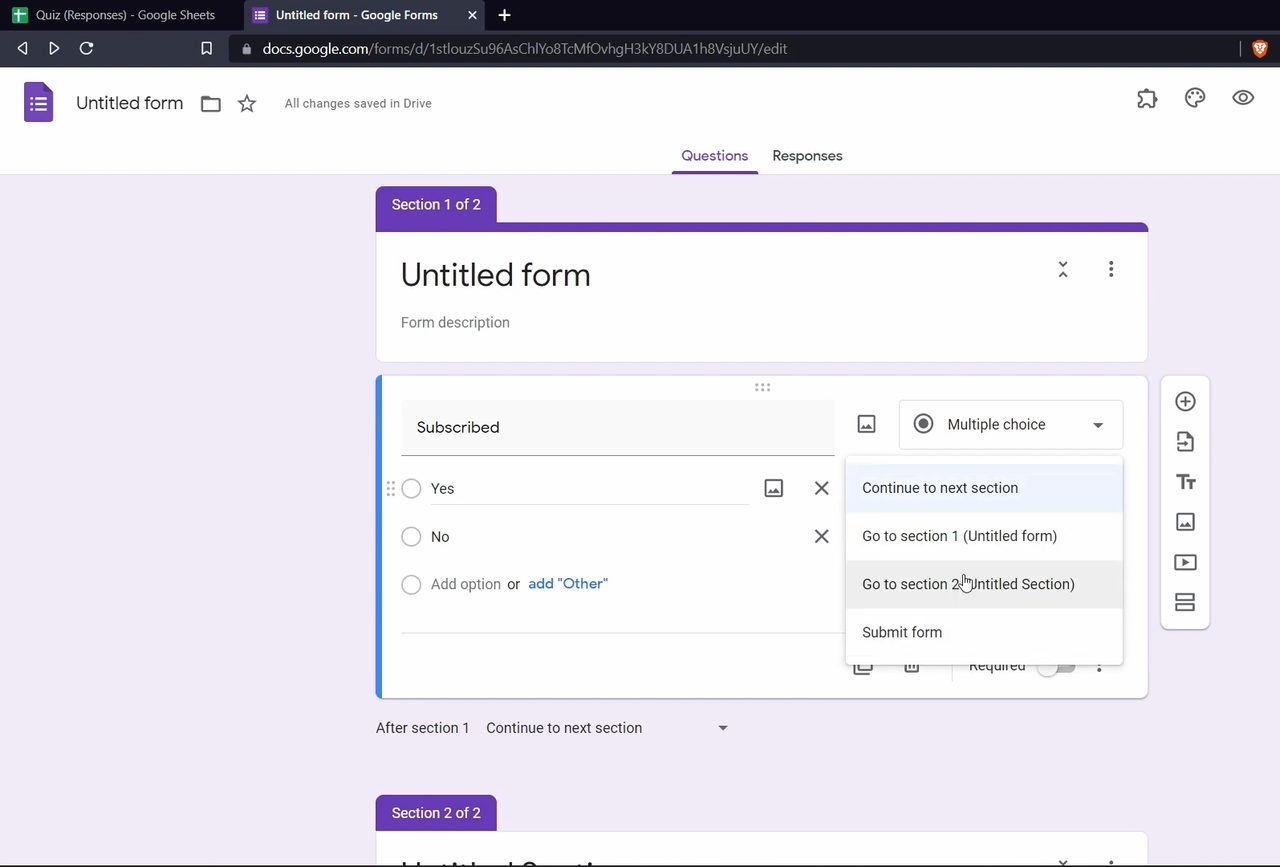
Click the first question, click its three dots and select Go to section based on answer. A dropdown appears next to each option. For Yes choose Submit form, and for No choose Go to section 2. Use Preview (the eye icon) to test it: answering Yes submits straight away, while No opens the Reason question. Turn on Required if the follow-up must be answered.
Trick 4: Add a timer to your Google Form
7Install Quilgo and open it
Open Add-ons again and install Quilgo - Timer & Proctoring the same way. Then click the Add-ons icon, choose Quilgo - Timer & Proctoring and click Configure. In the panel at the bottom right, click the button to create your Quilgo account. It opens the Quilgo website.
8Create a timed test and share the link
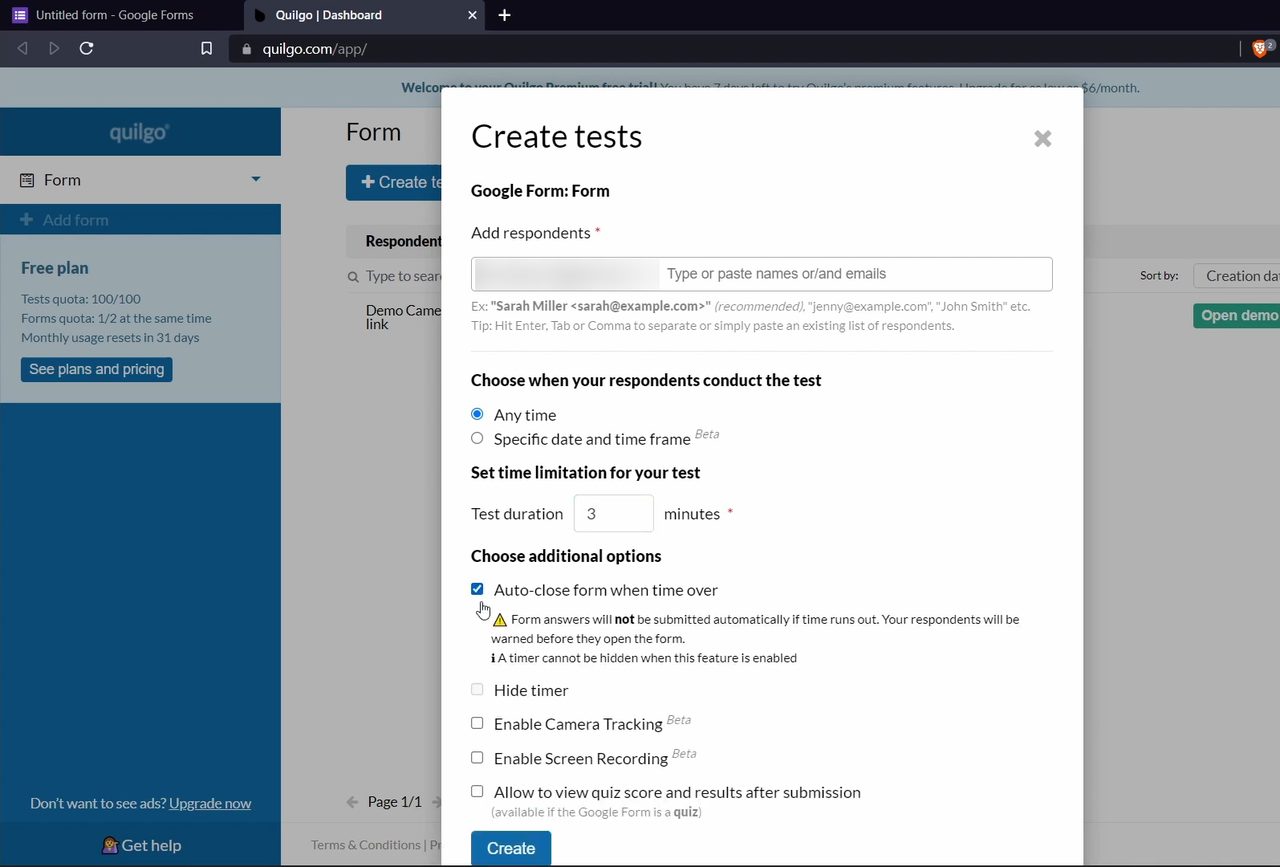
On the Quilgo dashboard, click Create tests. Add the respondents' email addresses, choose Any time or a Specific date and time frame, and enter the Test duration in minutes (we used 3). Tick Auto-close form when time over if you want the form to close at the deadline, then click Create. Click Copy URL to send the link to that person, or use Public form link to get one link for everyone. Respondents see the questions with a countdown timer at the top.
Trick 5: Auto grade a quiz
9Turn the form into a quiz
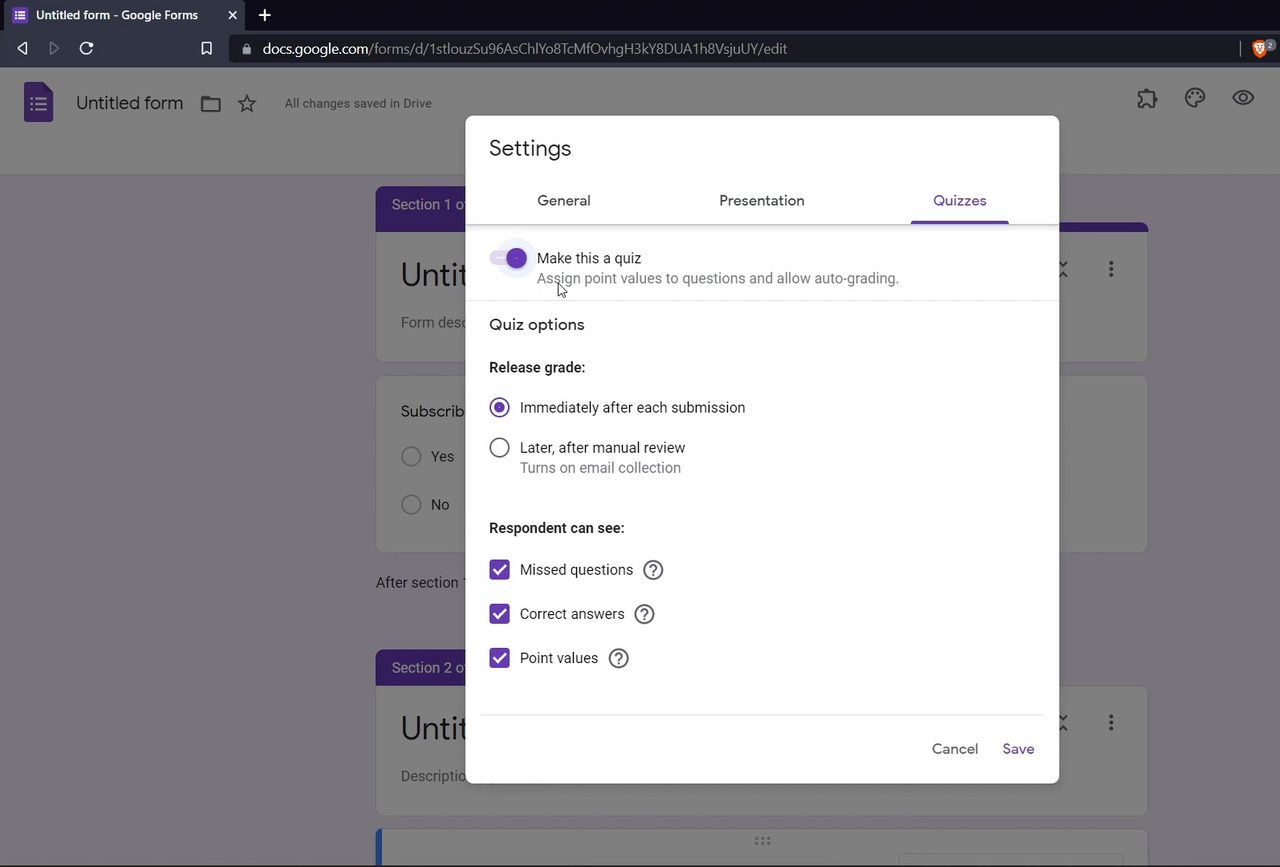
Click the Settings gear at the top of the form, open the Quizzes tab and switch on Make this a quiz. This lets you give questions point values and grade them automatically. Choose when to release grades and whether respondents can see Missed questions, Correct answers and Point values, then click Save.
10Set the answer key and points
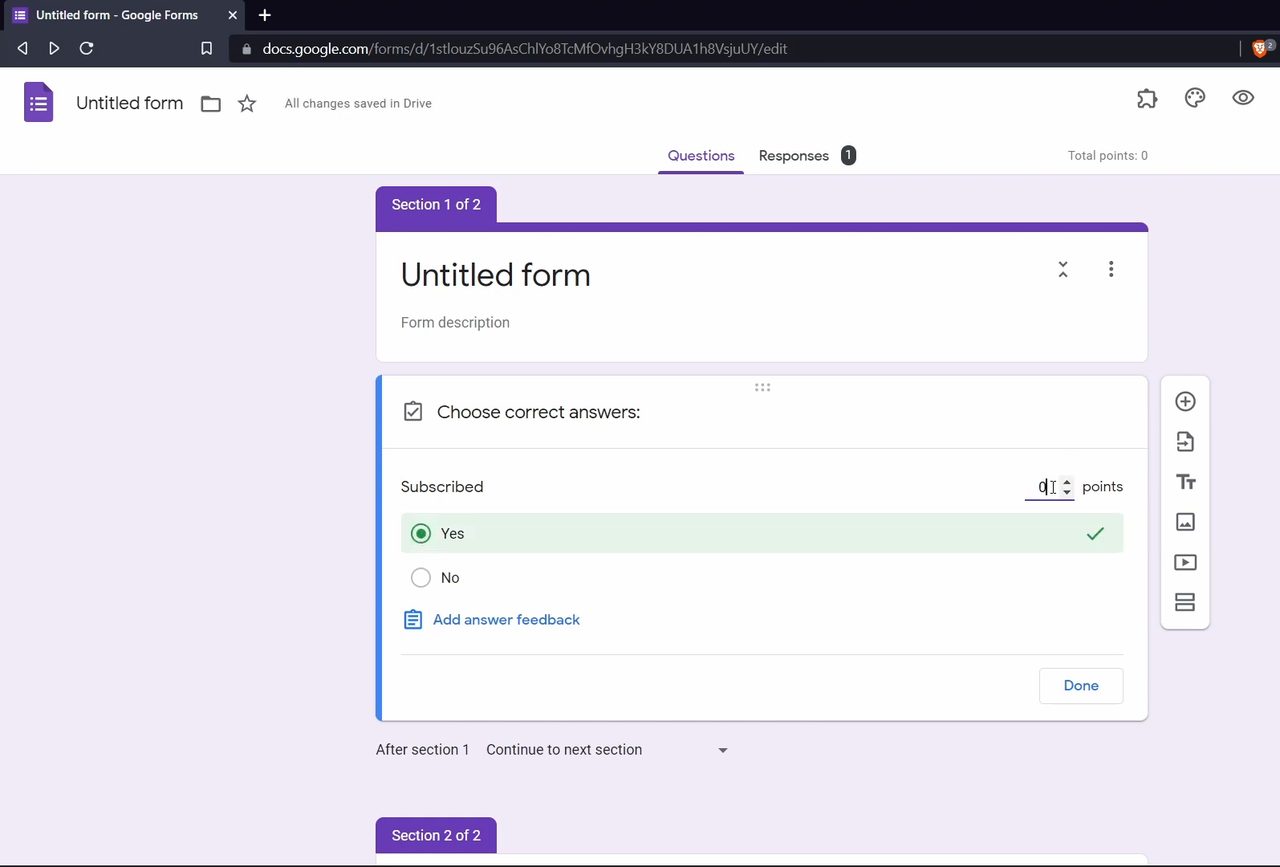
Click a question and then Answer key at its bottom left. Select the correct answer, enter how many points it is worth in the top right, and click Done. Preview the form to test it: the right answer scores full points, a wrong one scores 0 and shows the correct answer. Linking the quiz to a sheet (Step 1) adds every score as a column.
Things to know before you use these
- Quilgo's auto-close does not submit unfinished answers. The warning in the Quilgo dialog says form answers will not be submitted automatically if time runs out, and respondents are warned before they start. Ask people to submit before the timer ends.
- Add-on plans change. When we recorded this, Quilgo's free plan showed a quota of 100 tests and 2 forms at a time. Check the current plans on its site before relying on it for a big exam.
- Add-ons need permissions. Both add-ons ask for access to your Google account when you install them, so read what they request before clicking allow.
- Answer keys work on most question types. Google's Create and grade quizzes help page lists short answer, multiple choice, checkboxes, dropdown and the grid types. Paragraph answers need manual grading.
For more detail on the first and third tricks, see How to Link Google Forms to Google Sheets and How to Add Conditional Questions in Google Forms.
Troubleshooting
- Go to section based on answer is missing. Google's help page says it is only available for multiple choice and dropdown questions, and you need at least two sections to send people anywhere.
- The quiz shows no score. Make sure the question has an answer key and a point value, and that Make this a quiz is still on.
FAQ
How do I add a timer in Google Forms?
Google Forms has no built-in timer, so use an add-on such as Quilgo. Install it from Add-ons, click Configure, create a free account, then use Create tests to set the test duration and share the link it gives you.
How do I limit responses on Google Forms?
Install the formLimiter add-on, open it from the Add-ons icon, click Set limit, choose number of form responses, enter your limit and click Save and enable. The form stops accepting responses once that number is reached.
Can Google Forms grade answers automatically?
Yes. Turn on Make this a quiz in Settings > Quizzes, then set an Answer key and points for each question. Scores are calculated as soon as someone submits.
How do I send Google Form responses to Google Sheets?
On the Responses tab, click the green Create Spreadsheet icon, choose a new or existing spreadsheet and click Create. New responses are added to the sheet automatically.
Related guides