Tech is Easy
How to Set Up Chrome Autofill (Passwords, Addresses, Cards)
To set up Chrome autofill, click the three dots at the top right of Chrome, open Settings, then select Autofill. From there you can save passwords in Password Manager, cards in Payment methods and your name, phone and address in Addresses and more. Once saved, Chrome fills logins and online forms for you, with no extension needed. This guide is for anyone using Chrome on a laptop or desktop who is tired of typing the same details again and again.
What Chrome autofill can save
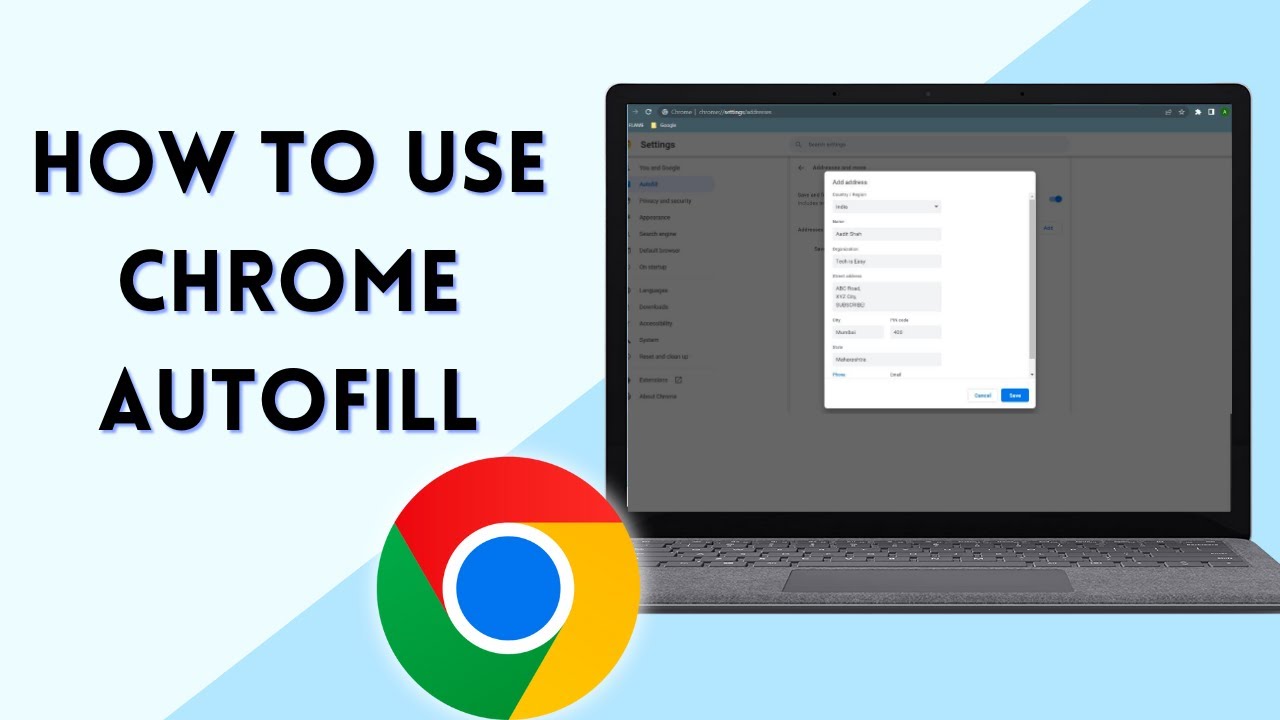
Chrome autofill handles three kinds of information: - Passwords: the username and password for each website, so you can sign in without typing. - Payment methods: your card number, expiry date and name on card, filled in at checkout. - Addresses and more: your name, organization, street address, city, PIN or ZIP code, state, phone number and email.
Google's help page Fill out forms automatically in Chrome notes that the save and fill setting is on by default for each of these, so autofill may already be partly working for you. The steps below show how to add your details yourself and check the settings.
The video was recorded on Chrome in 2023 on Windows. Newer versions of Chrome may label this area a little differently: Google's help page now calls the menu item Passwords and autofill, but the sections and buttons work the same way.
1Open Chrome settings
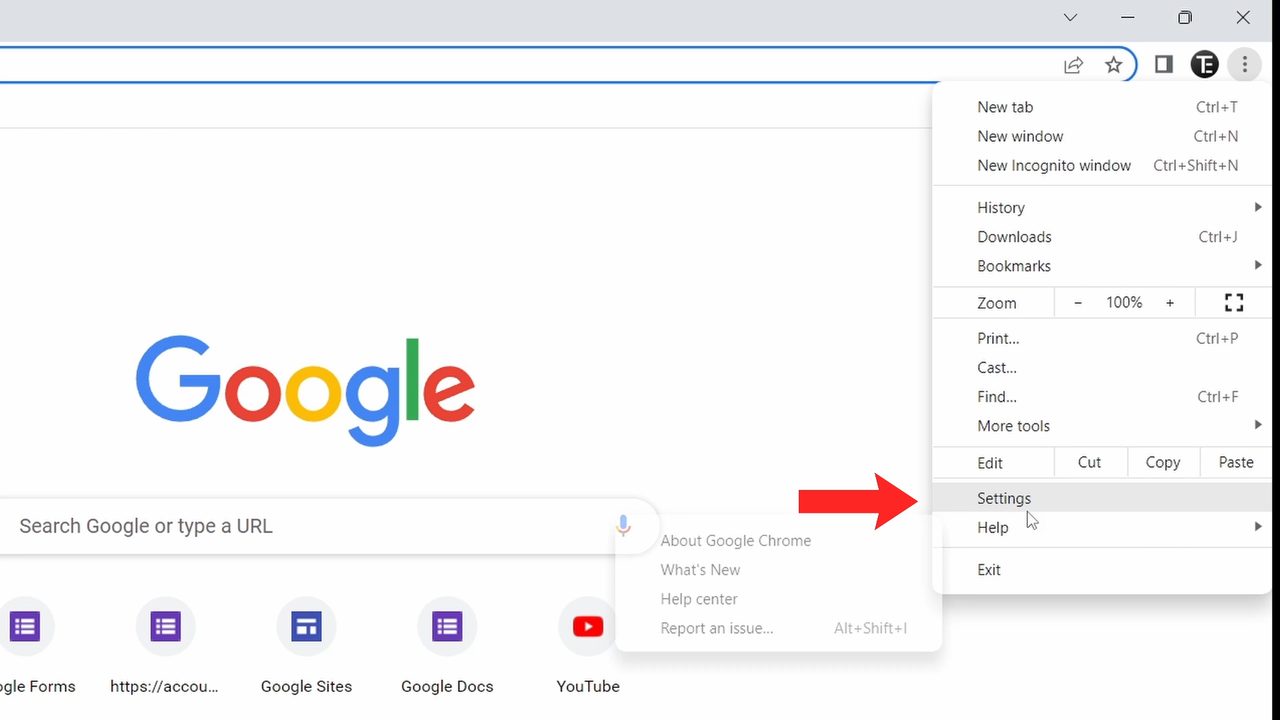
Open Chrome and click the three dots in the top right corner. In the menu, click Settings near the bottom.
2Go to Autofill
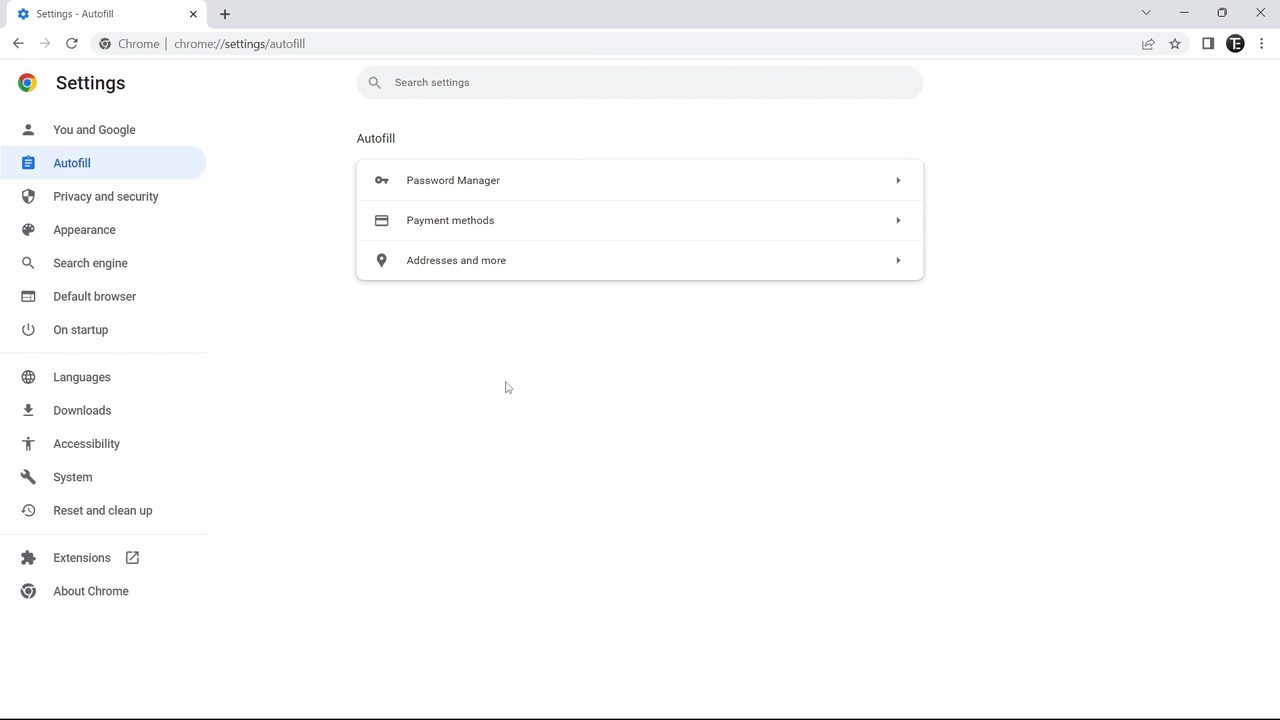
On the left side of the Settings page, click Autofill (the second option). You will see three sections: Password Manager, Payment methods and Addresses and more.
Method 1: Save passwords
3Open Password Manager and click Add
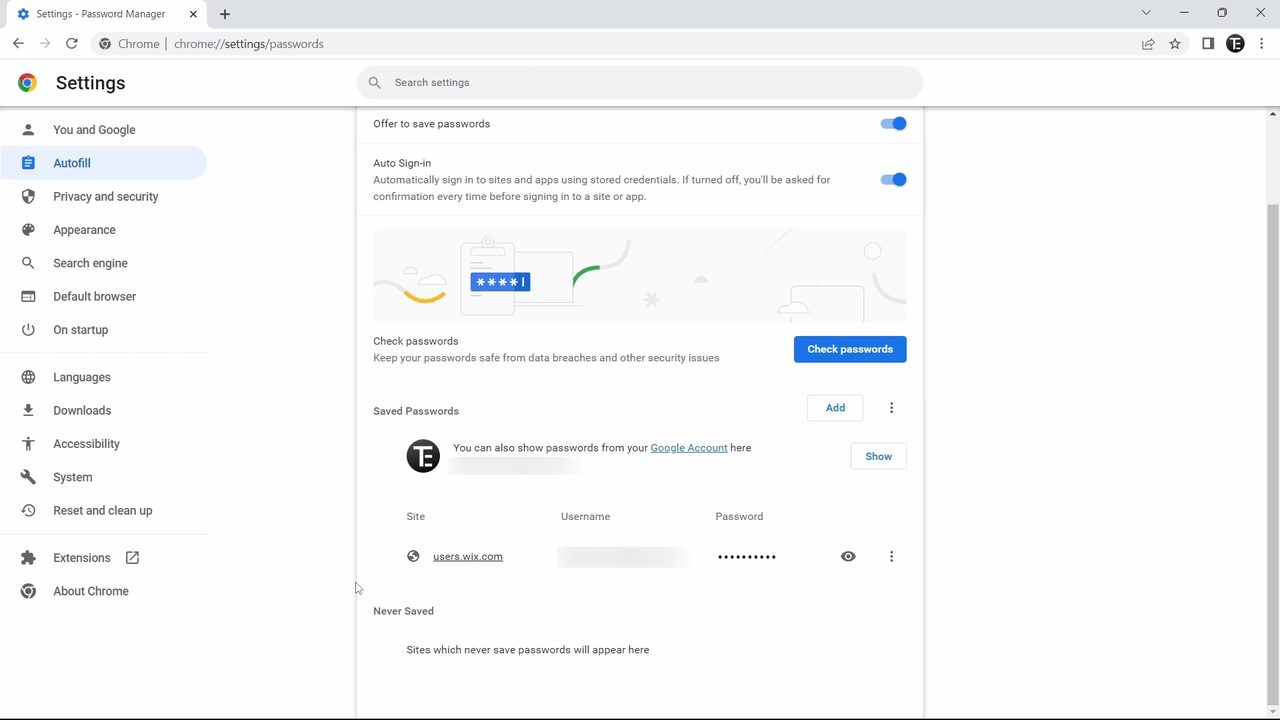
Click Password Manager. Scroll down to Saved Passwords to see every password Chrome already knows. To add a new one, click Add.
4Enter the site, username and password
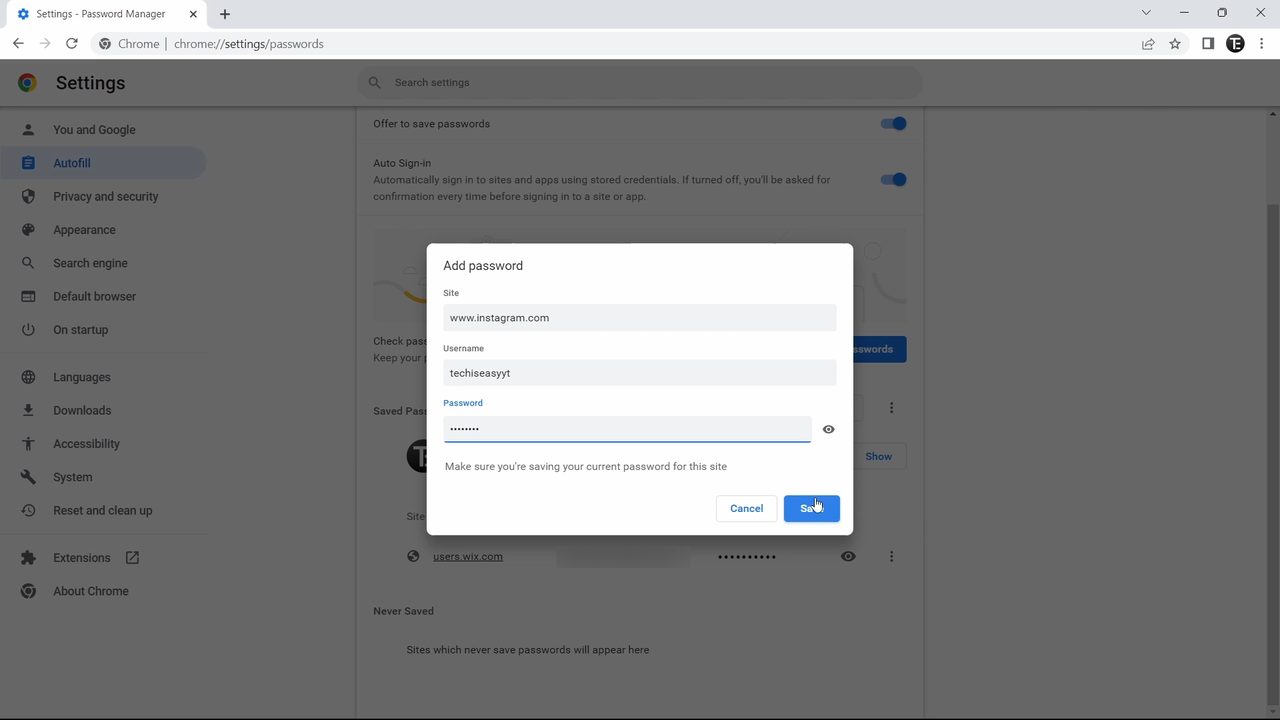
In the Add password box, type the website in Site (for example instagram.com), then your Username and Password. Click Save.
5Test it on the website
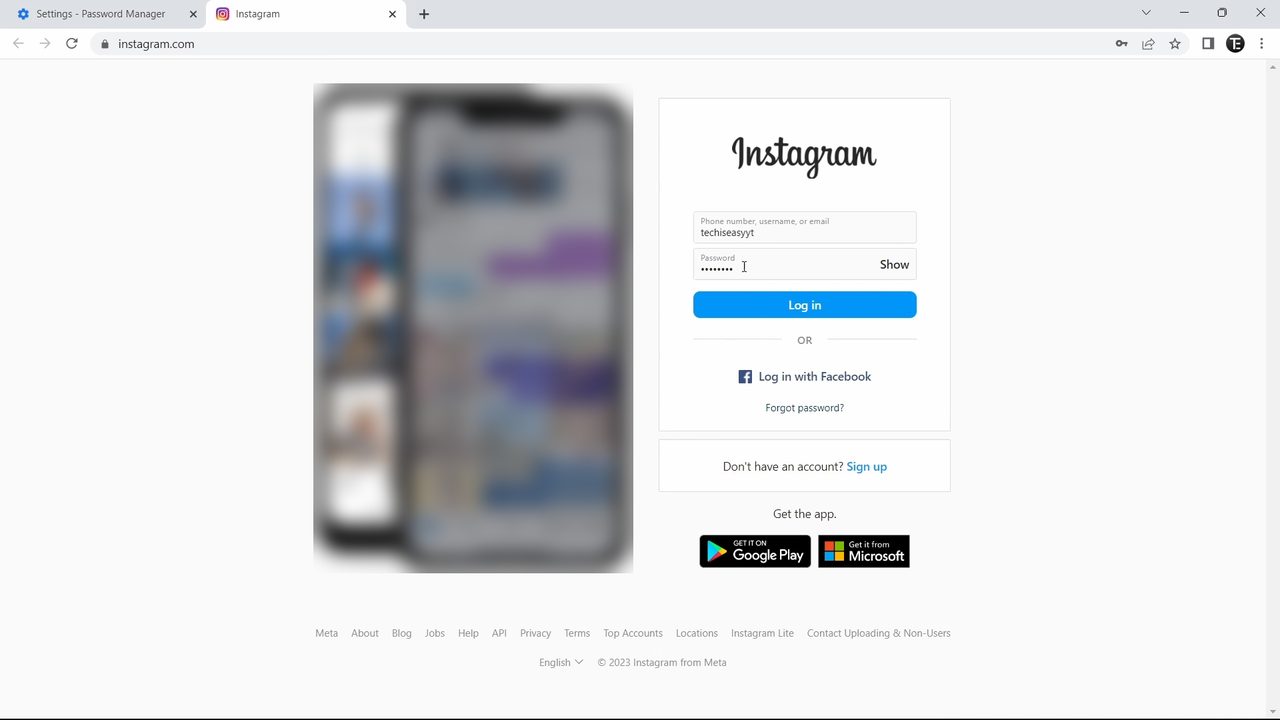
Open the site you just saved. Chrome fills the username and password into the login form by itself, so you only need to click Log in.
6Edit, remove and choose password settings
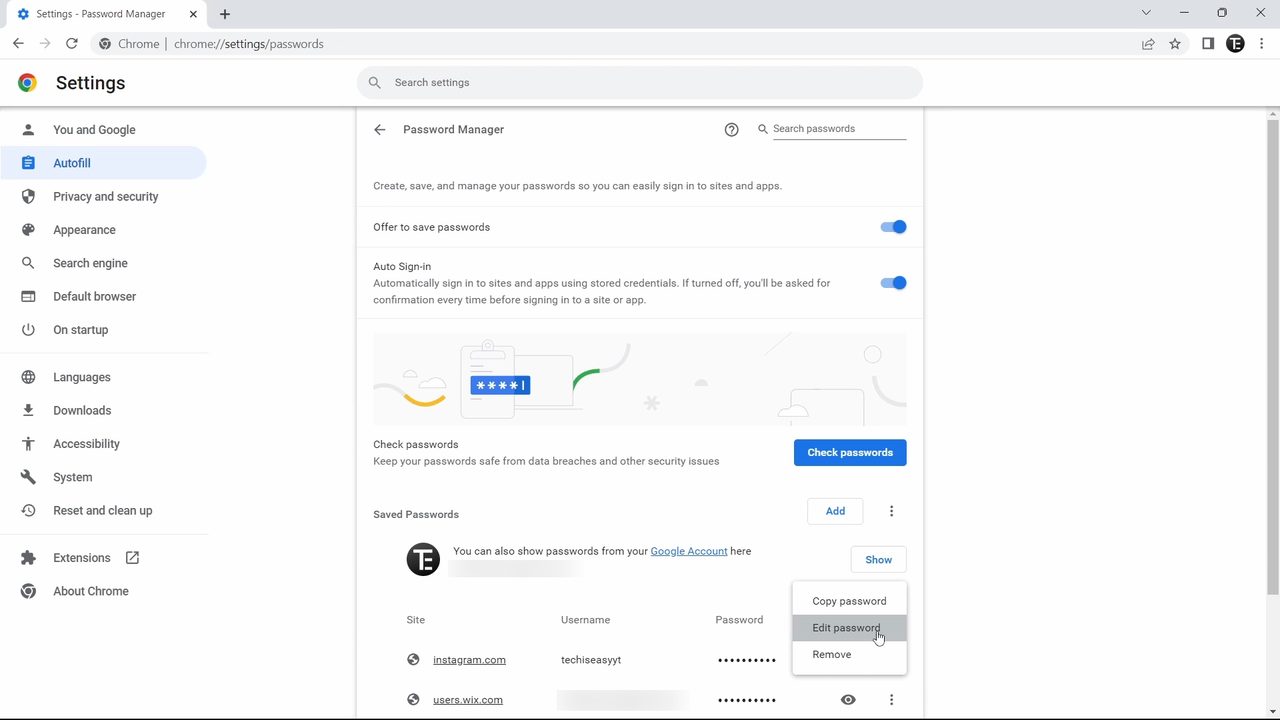
To change or delete a saved password, click the three dots next to it and pick Edit password or Remove. At the top of Password Manager there are two switches worth keeping on: - Offer to save passwords: Chrome asks to save a password each time you enter a new one on a website. - Auto Sign-in: Chrome signs you in to sites with stored details automatically. If it is off, Chrome asks for confirmation each time.
Method 2: Save your address and contact details
7Open Addresses and more and click Add
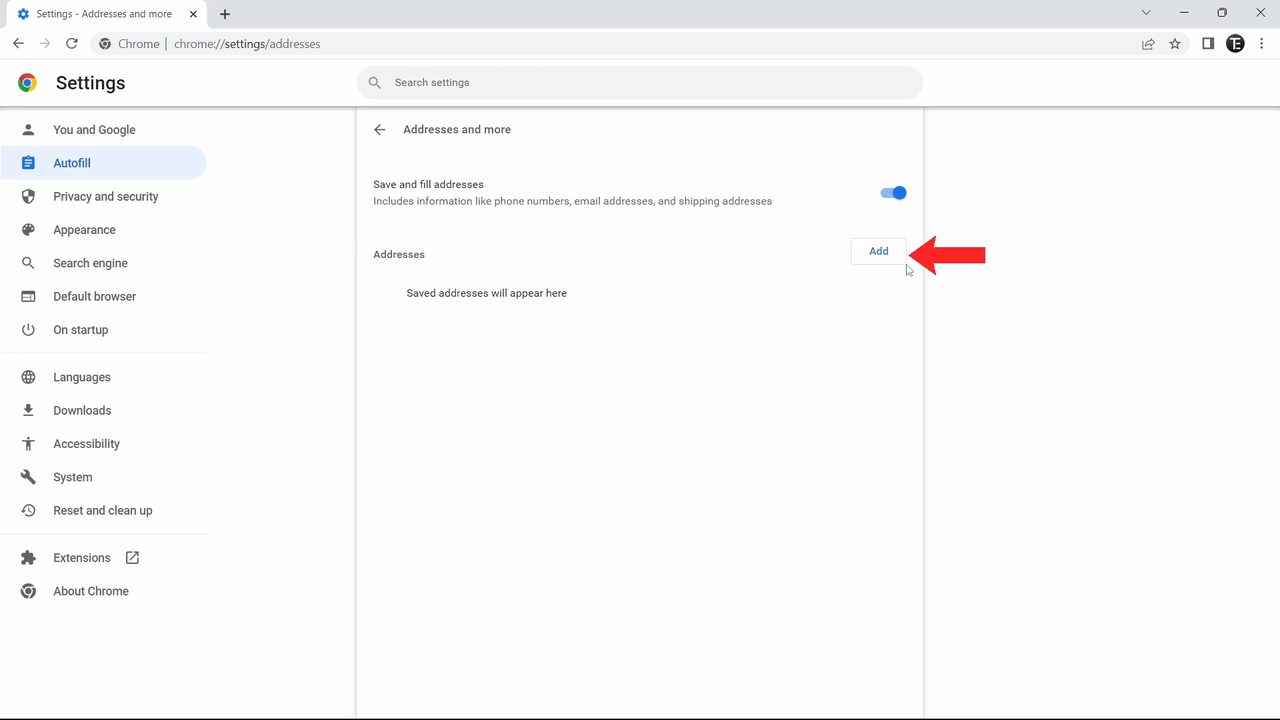
Go back to Autofill and click Addresses and more. Next to Addresses, click Add. Make sure Save and fill addresses at the top is switched on, or Chrome won't fill your address into forms.
8Fill in your details and save
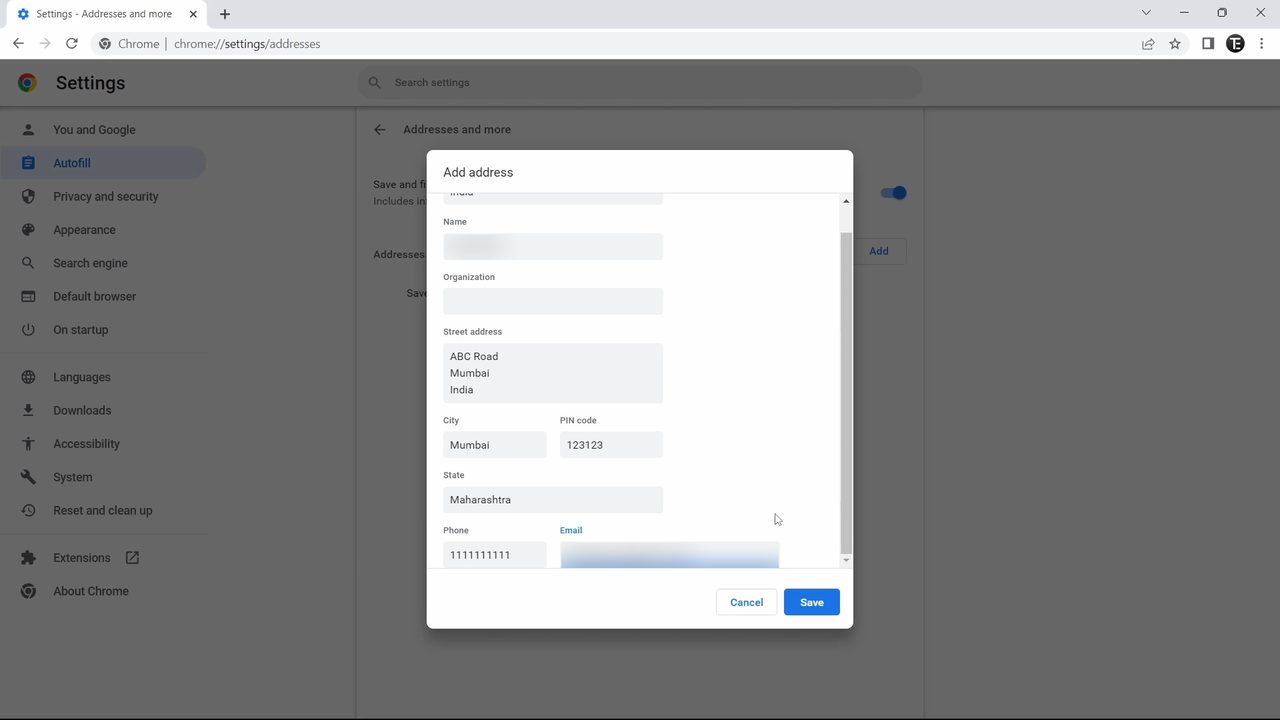
Enter your name, organization (optional), street address, city, PIN code, state, phone and email, then click Save. Next time a website asks for this, Chrome offers to fill it in. To change or delete it later, click the three dots next to the saved address and choose Edit or Remove.
Method 3: Save a payment card
9Add a card in Payment methods
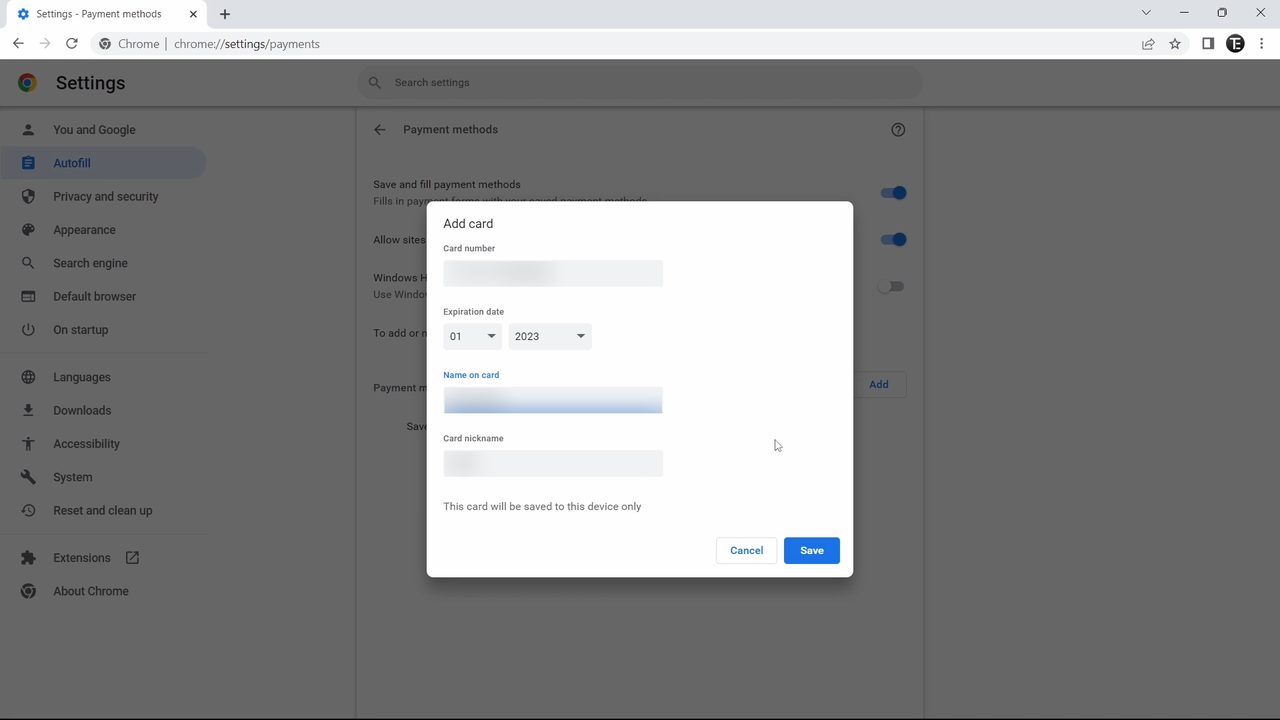
Back in Autofill, click Payment methods, then Add next to Payment methods. Enter the Card number, Expiration date, Name on card and an optional Card nickname, then click Save. Chrome notes that the card is saved to this device only.
10Keep the payment switches on
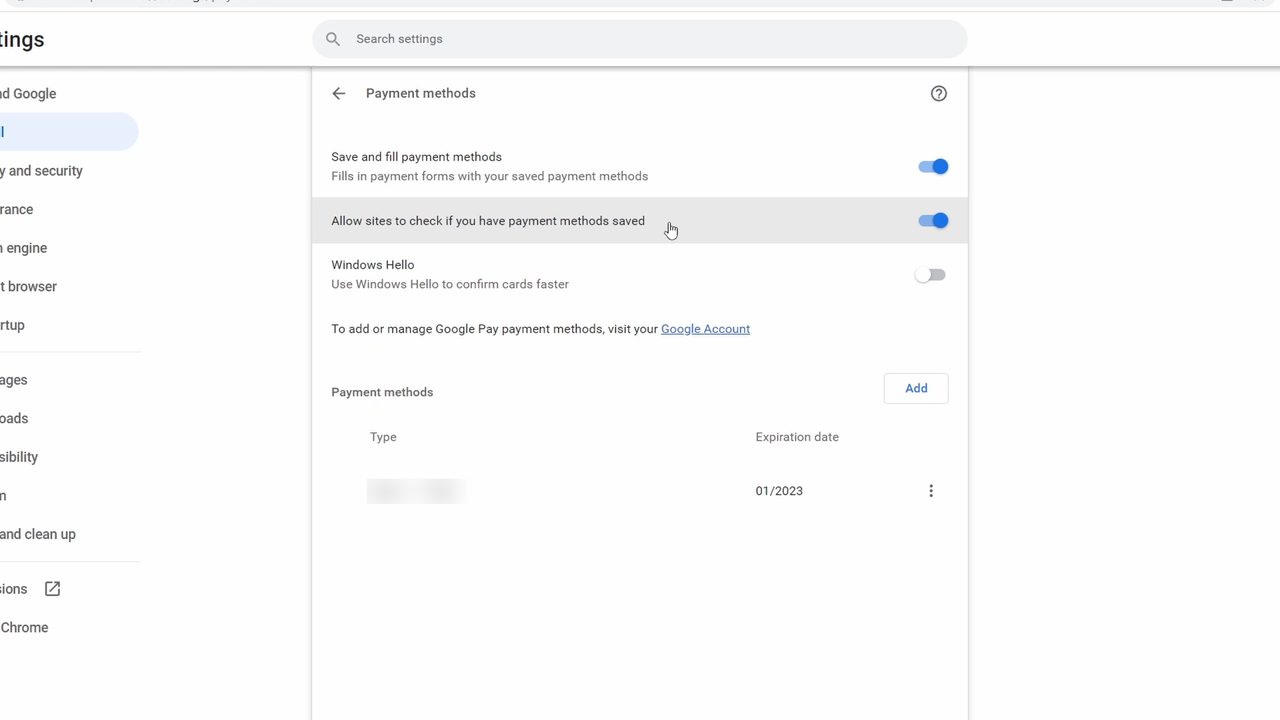
Your card now appears under Payment methods. Leave these two switches on: - Save and fill payment methods: fills checkout forms with your saved card. - Allow sites to check if you have payment methods saved: lets websites see whether a saved card is available so they can offer it.
Before you start saving everything
- Anyone using your computer profile can use autofill. If others share your laptop, think twice before saving cards, or give them their own Chrome profile.
- Saved passwords can sync. According to Google, when you are signed in to Chrome, passwords can be saved to your Google Account and used on your other devices. You can also see them at passwords.google.com.
- Use Check passwords. The Check passwords button in Password Manager scans your saved passwords for data breaches and other security issues.
To see or copy passwords Chrome has already saved, read How to View Saved Passwords in Chrome.
Troubleshooting
- Chrome isn't filling anything in. Check that the matching save and fill switch is on (Step 7 for addresses, Step 10 for cards, Step 6 for passwords). Google says that if this setting is off, autofill won't work for that type of info.
- The wrong login is filled in. If you saved more than one username for the same site, click the username box and choose the account you want from the list.
- A password changed on the website. Chrome won't know about it. Use Edit password in Step 6, or let Chrome offer to update it the next time you sign in.
- A card saved in Google Pay or Google Wallet can't be edited here. Google's help page says cards saved in Google Wallet have to be edited or deleted in Google Wallet.
FAQ
How do I set up Chrome autofill on my laptop?
Open Chrome, click the three dots, go to Settings and select Autofill. Add your logins under Password Manager, your address under Addresses and more and your cards under Payment methods.
Do I need an extension for Chrome autofill?
No. Autofill is built into Chrome. Everything in this guide is done in Chrome's own settings without installing anything.
How do I delete autofill data in Chrome?
Open the section the data is in, click the three dots next to the saved entry and choose Remove. This works for passwords, addresses and cards.
Why is Chrome autofill not working?
Usually the save and fill switch for that type of info is turned off, or the details were never saved. Check the switches in each Autofill section and make sure your info is listed there.
Related guides