Tech is Easy
How to Use Clipchamp Screen Recorder on Windows 11
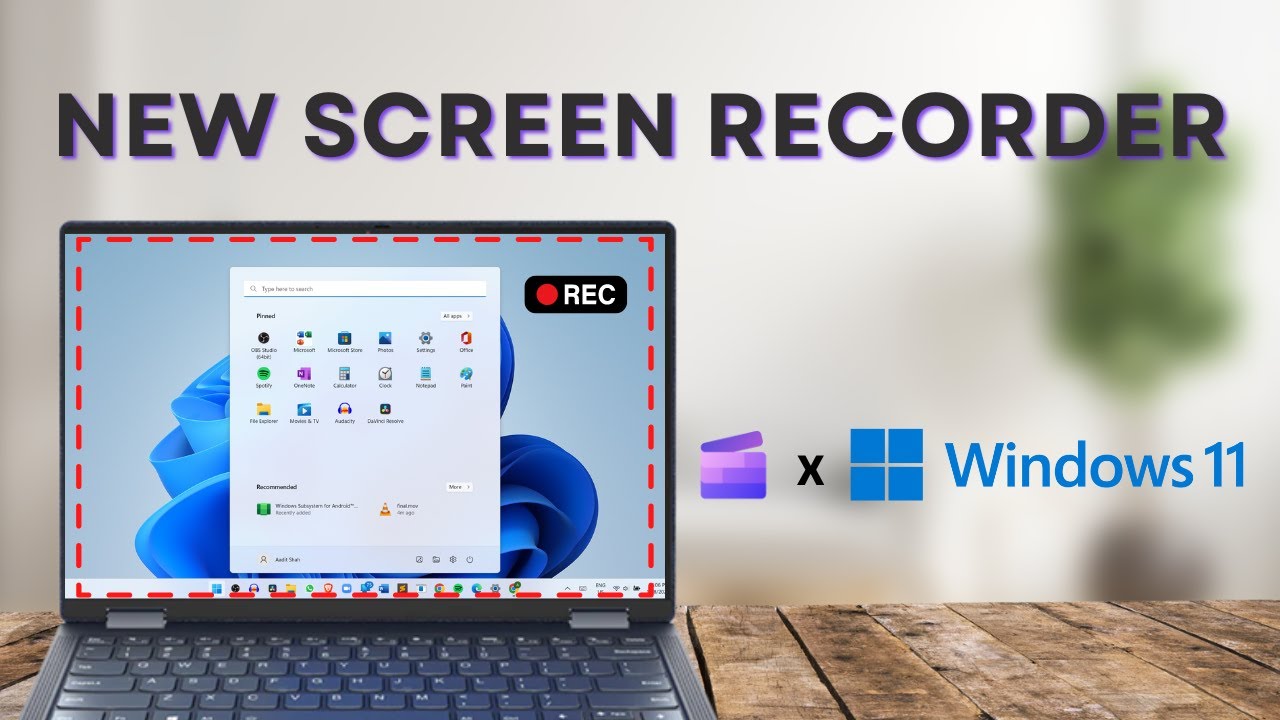
To use the Clipchamp screen recorder, open Clipchamp from the Start menu (or install it free from the Microsoft Store), choose Screen & camera or Screen under Start with a recording, click the red record button, pick what to share and click Share. When you're done, click Stop sharing, then Save and edit to trim and export your video. It's a simple way to screen record in Windows 11 without third-party software, handy for tutorials, presentations and quick how-to videos.
What you need
- A Windows 11 PC. Clipchamp became Microsoft's built-in video editor with the Windows 11 2022 update (22H2), and on older builds you can get it from the Microsoft Store.
- A Microsoft account to sign in to Clipchamp
- A webcam and microphone if you want your face and voice in the recording
This guide was recorded in 2022, so some menus may look slightly different now. Microsoft's current help page, How to make a screen recording, says the recorder for personal accounts now sits under the Record & create tab in the editor's toolbar.
1Open or install Clipchamp
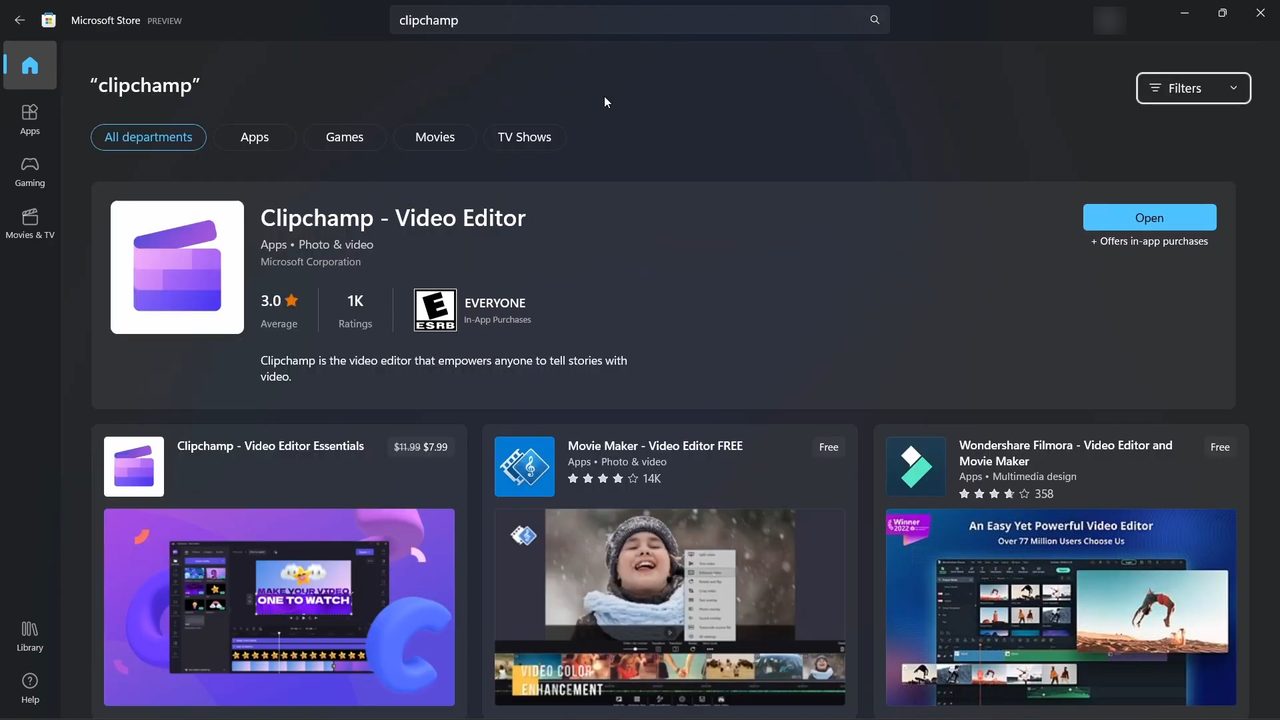
Search for Clipchamp in the Start menu. If it isn't there, open the Microsoft Store, search for clipchamp and install Clipchamp - Video Editor by Microsoft Corporation. Once it's installed, the button changes to Open.
2Choose what to record
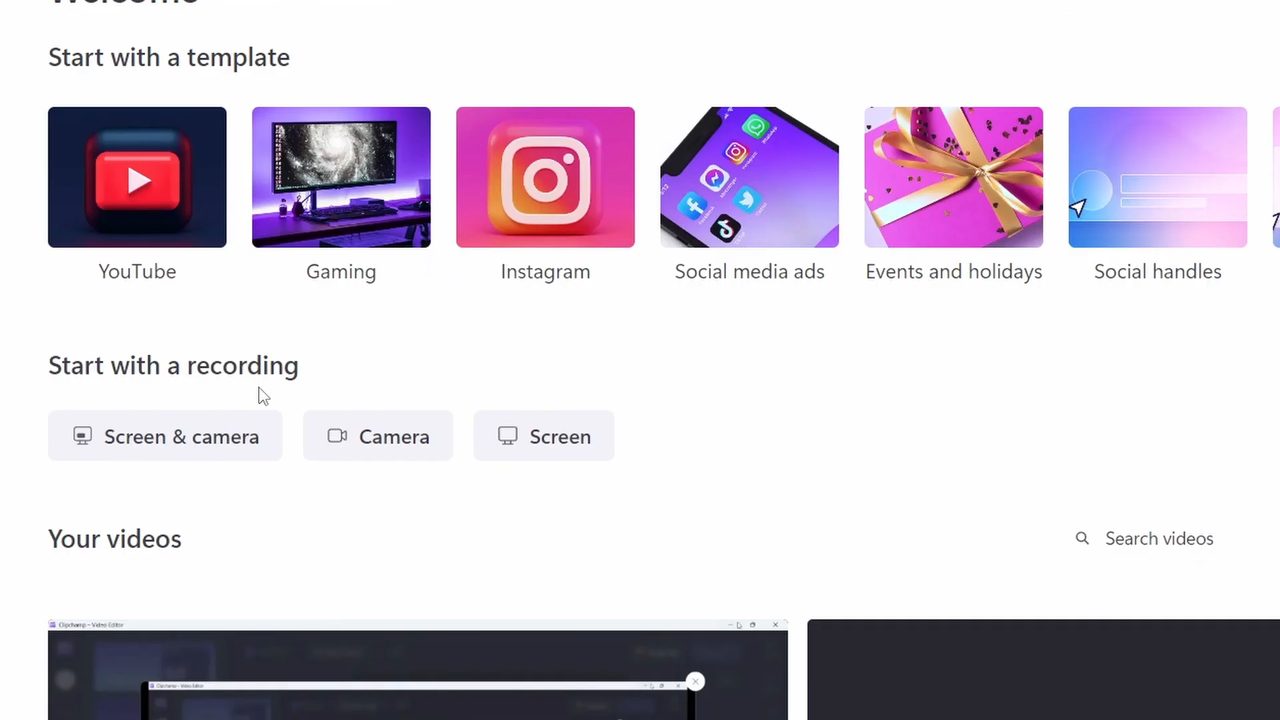
On the Clipchamp home page, look for Start with a recording. There are three options: - Screen & camera records your screen with your webcam in a small box at the bottom left. - Camera records only your webcam. - Screen records only your screen.
We picked Screen & camera.
3Set up your camera and microphone
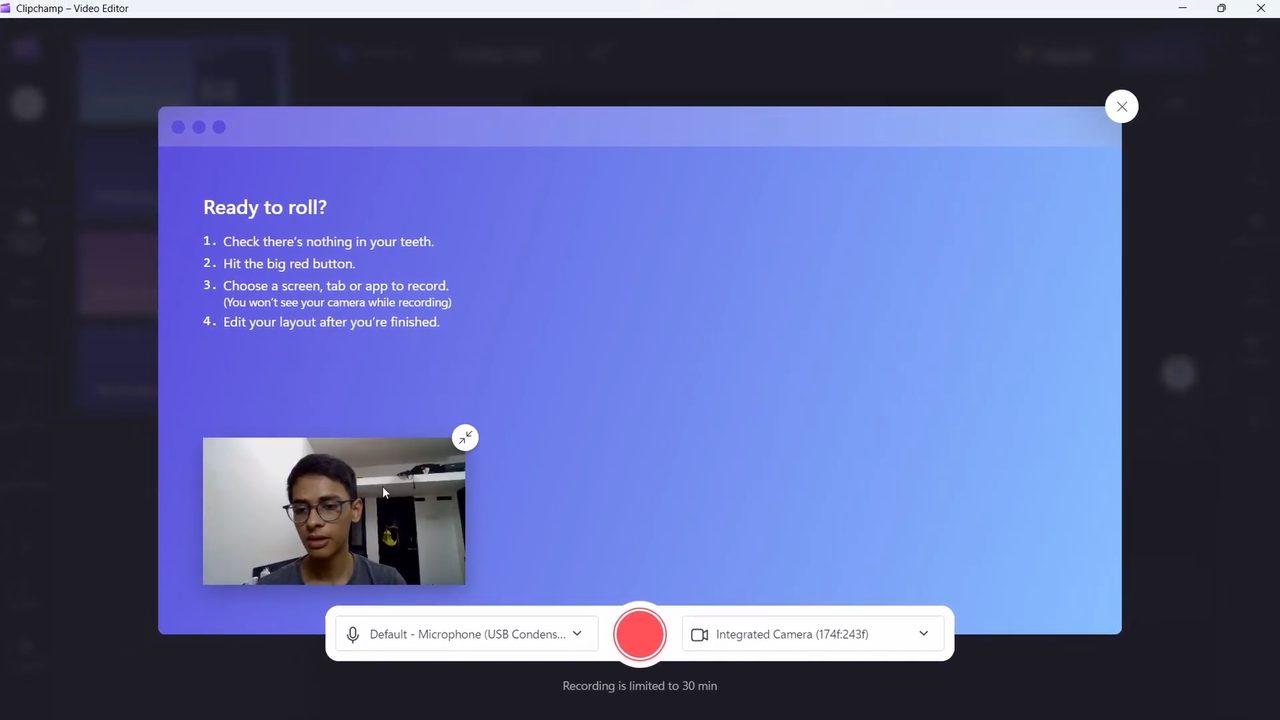
The Ready to roll? screen opens with your webcam preview at the bottom left. Click the arrow icon on the preview to make it bigger. Use the dropdowns at the bottom to pick your microphone and camera if you have more than one. Note the line underneath: Recording is limited to 30 min. When ready, click the big red record button.
4Pick the screen, window or tab to share
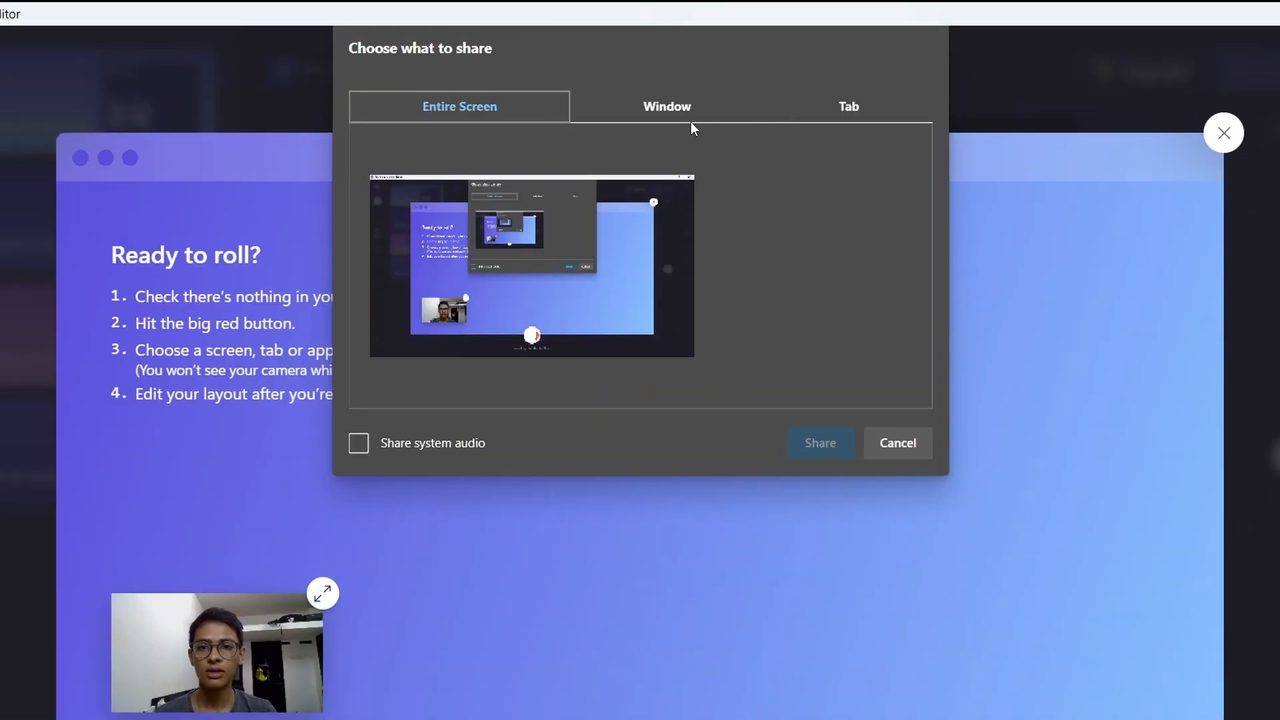
A Choose what to share box appears with three tabs: Entire Screen, Window (a single app) and Tab (one browser tab). Select what you want, tick Share system audio if you want sound from your PC in the recording, and click Share. Recording starts straight away.
5Stop recording and save it
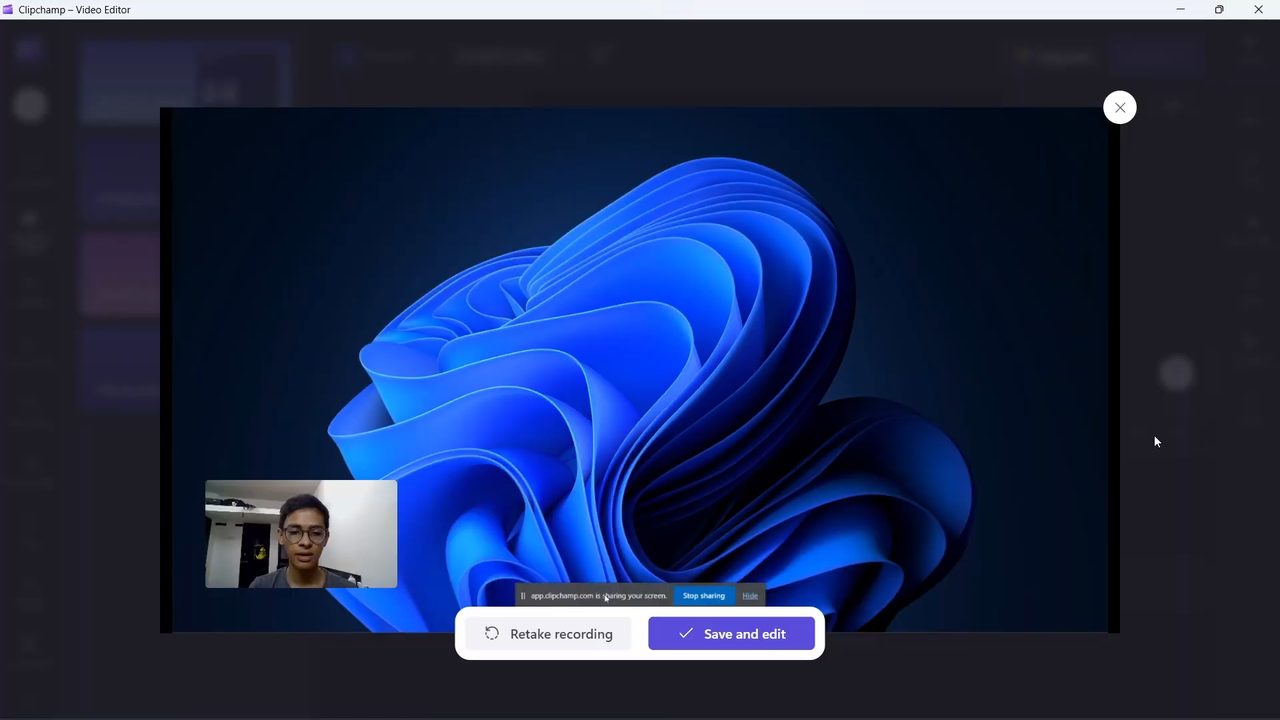
Do whatever you want to record. When you're done, click Stop sharing in the bar at the bottom of the screen. Back in Clipchamp you get a preview with two buttons: Retake recording if you want to start over, or Save and edit to keep it.
6Edit the recording
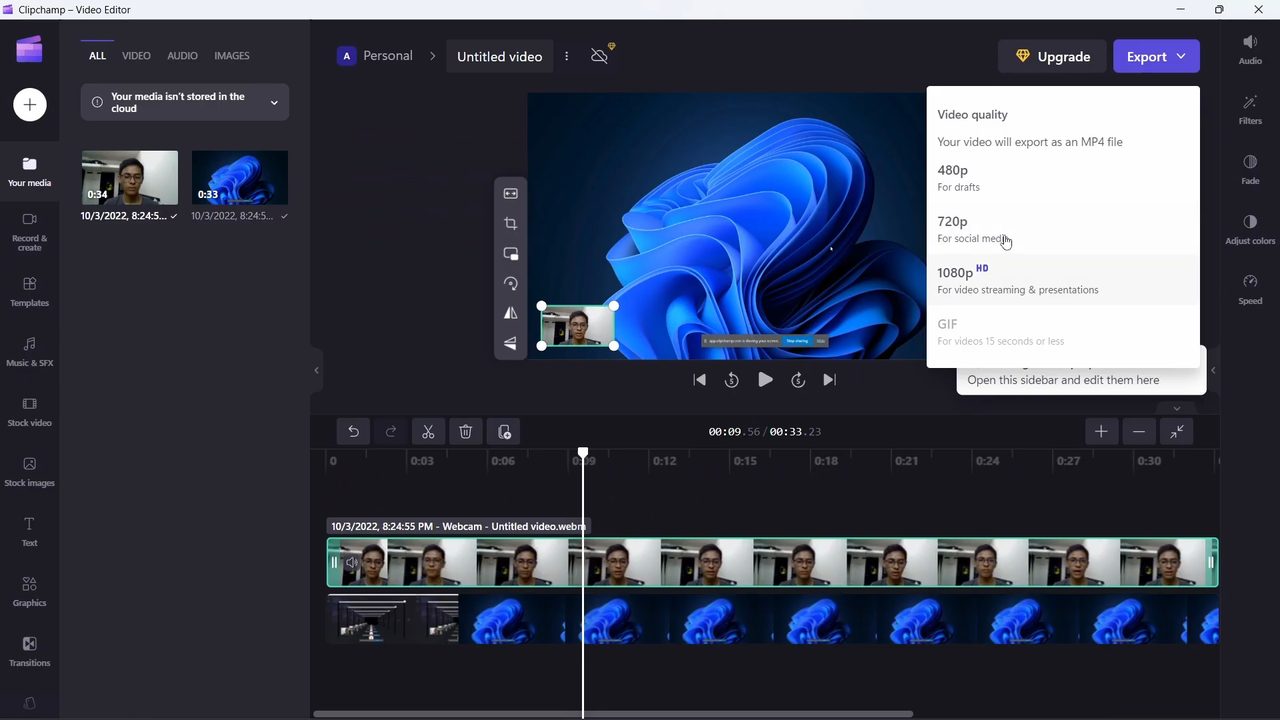
Save and edit opens the Clipchamp editor with your screen and webcam as two separate tracks on the timeline. Drag the corners of the webcam box to resize it or move it anywhere on the video. The left sidebar has extra options like Templates, Music & SFX, Stock video, Stock images, Text and Transitions. When you're happy, click Export at the top right and choose a quality: 480p for drafts, 720p for social media or 1080p for streaming and presentations. The video exports as an MP4 file.
7Save or share the video
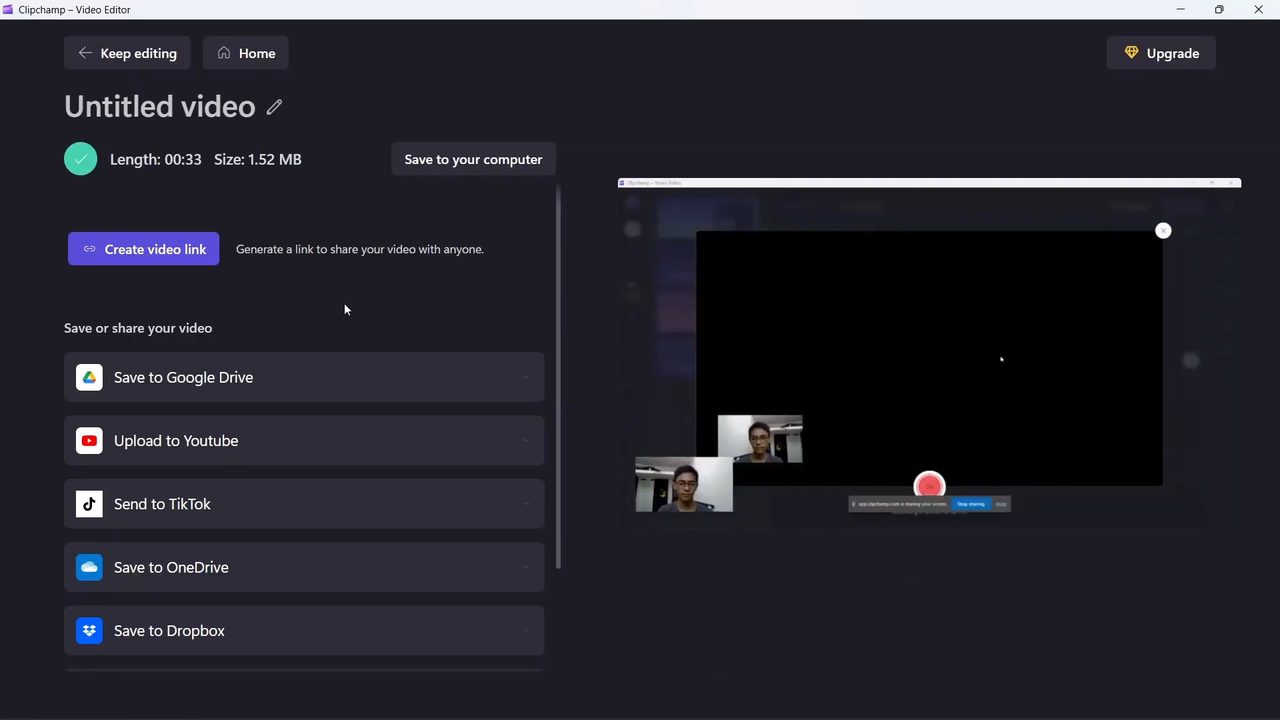
After exporting, click Save to your computer to download the MP4. You can also click Create video link to share it, or send it straight to Google Drive, YouTube, TikTok, OneDrive or Dropbox from the list.
Things to know
- 30-minute limit. Each recording stops at 30 minutes. Microsoft's help pages suggest recording longer videos in parts and joining them on the timeline.
- Screen and webcam stay separate. Because they are recorded as two tracks, you can resize, move or delete the webcam later without recording again.
- No camera on your PC? You can use your Android phone as a webcam: see How to Use Your Phone as a Webcam for PC.
- Recordings stay on your PC until you export. In our test the editor showed a note that the media isn't stored in the cloud, so export the finished video before you uninstall Clipchamp or switch computers.
- Want just a quick clip? For short captures, the Windows Snipping Tool can also record the screen, but it has no editor like Clipchamp.
Troubleshooting
- Camera or microphone not showing. Check the dropdowns on the Ready to roll? screen and make sure the right device is picked. Microsoft also has a help page for Clipchamp camera, microphone and screen recording permissions if Windows is blocking access.
- No sound from the PC in the recording. Tick Share system audio in the Choose what to share box before clicking Share.
- Clipchamp isn't on your PC. Install it from the Microsoft Store as in Step 1.
FAQ
Does Windows 11 have a built-in screen recorder?
Yes. Clipchamp is Microsoft's video editor for Windows 11 and includes a screen recorder that can capture your screen, your webcam or both. If it isn't on your PC, it's a free download from the Microsoft Store.
How long can I record with Clipchamp?
Each screen or camera recording is limited to 30 minutes. For longer videos, record in parts and put them together on the timeline.
Can I record my screen and webcam at the same time?
Yes. Choose Screen & camera. Your webcam shows in a box at the bottom left, and you can resize and move it in the editor afterwards.
How do I save a Clipchamp recording as an MP4?
Click Save and edit, then Export, pick a quality like 1080p, and click Save to your computer once it finishes. Clipchamp exports videos as MP4 files.
Related guides