Tech is Easy
How to Add Payment Option in Google Forms (UPI and Bank)
To add a payment option in Google Forms, add a multiple choice question asking how people want to pay, create one section per method (bank details in one, a UPI QR code image in the other), add a required File upload question for payment proof, and link each answer with Go to section based on answer. It suits anyone collecting fees for an event, a class or an order who wants payment and the form in one place.
Google Forms has no built-in payment gateway, so this method does not charge anyone automatically. People pay through their own bank app or UPI app (GPay, PhonePe, Paytm), then upload a screenshot or PDF as proof. You check the proof before confirming their entry.
What you need
- A Google account and a browser on a computer (we use forms.google.com)
- Your bank details for transfers
- An image of your UPI QR code, saved on your computer
1Create a blank form
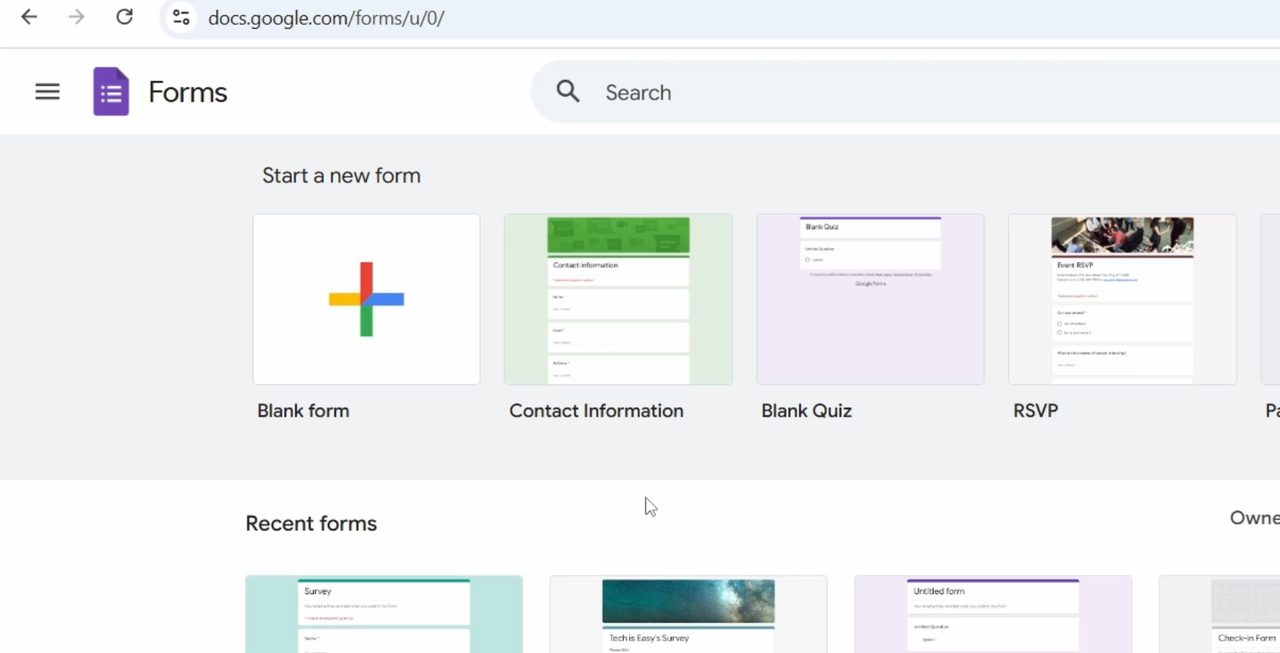
Go to forms.google.com and click Blank form. If you already have a form you want to add payments to, open it and skip to Step 3. New to Forms? See how to create a Google Form first.
2Add a title and basic questions
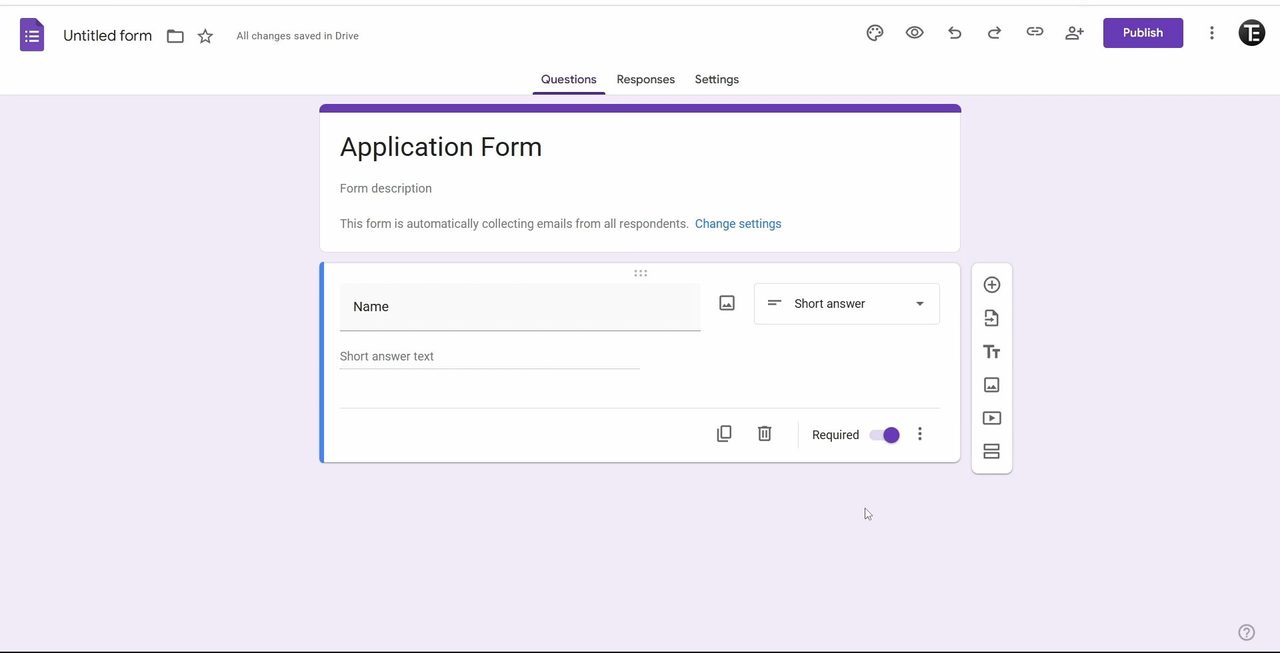
Give the form a title, then click Untitled question and type Name. Set the answer type to Short answer and turn on Required so nobody can submit without it. Click the + (Add question) button on the right toolbar to add more, such as Company.
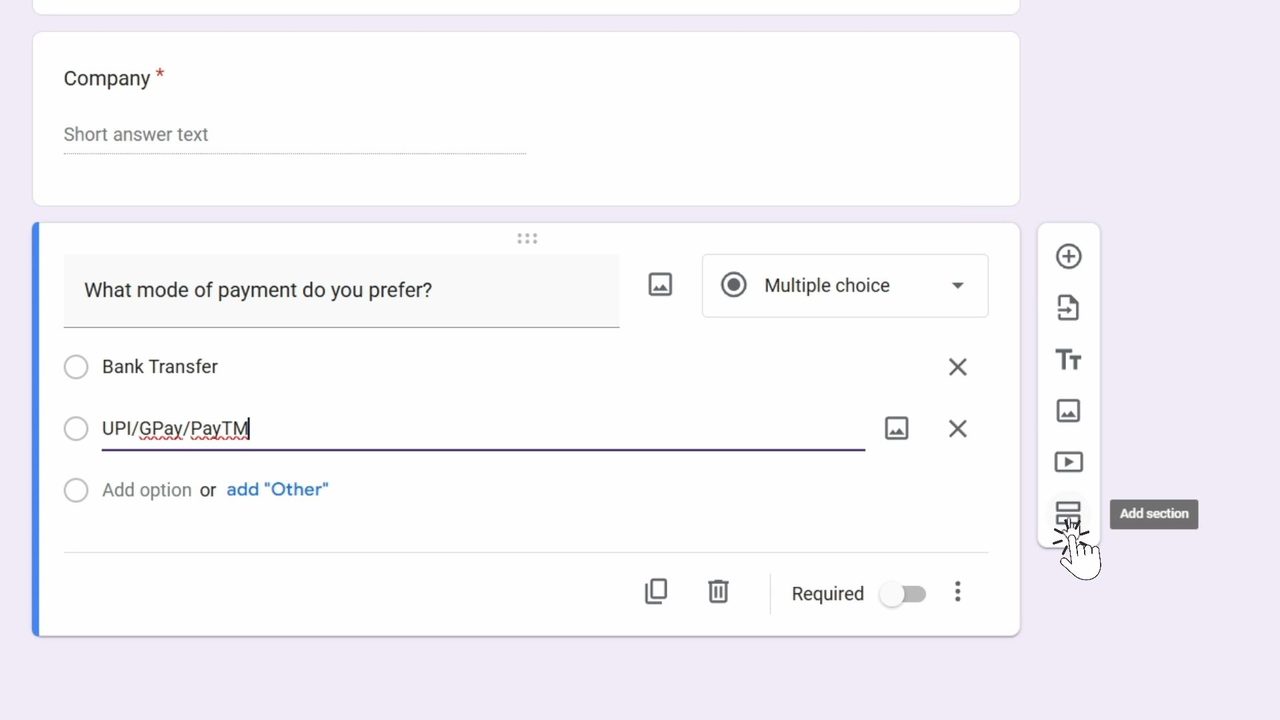
3Ask which payment method they prefer
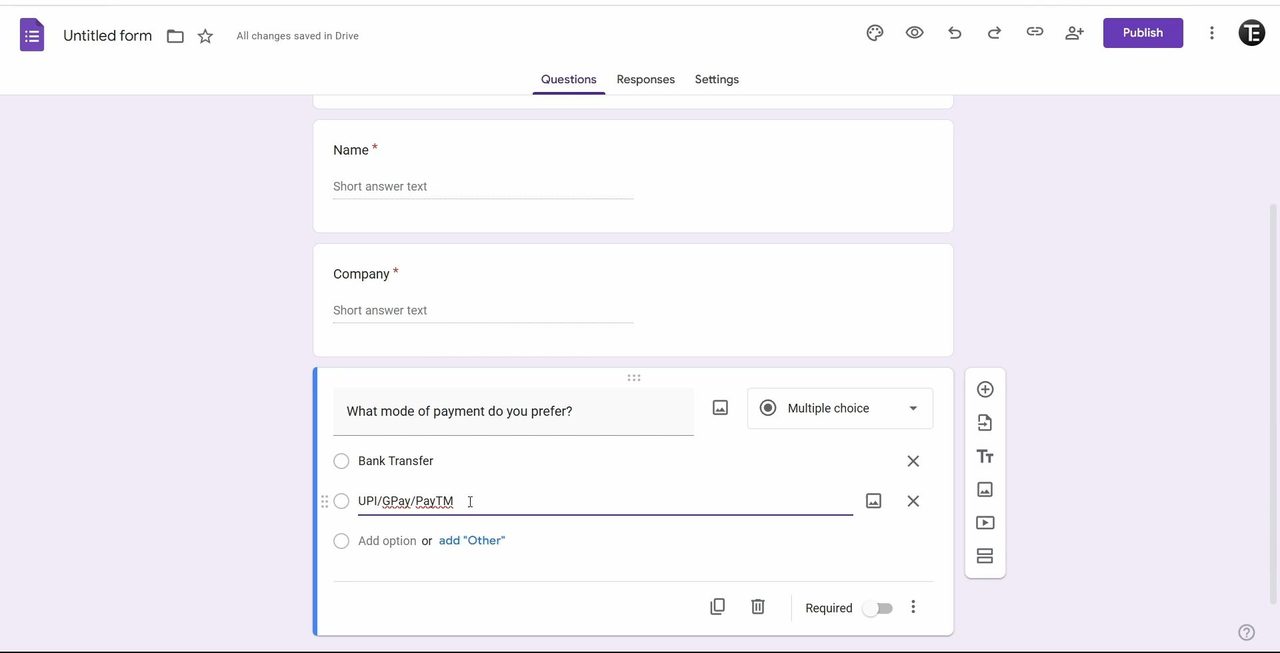
Click + again and add a Multiple choice question like "What mode of payment do you prefer?". Type Bank Transfer as option 1 and UPI/GPay/PayTM as option 2. Click Add option if you accept other methods too.
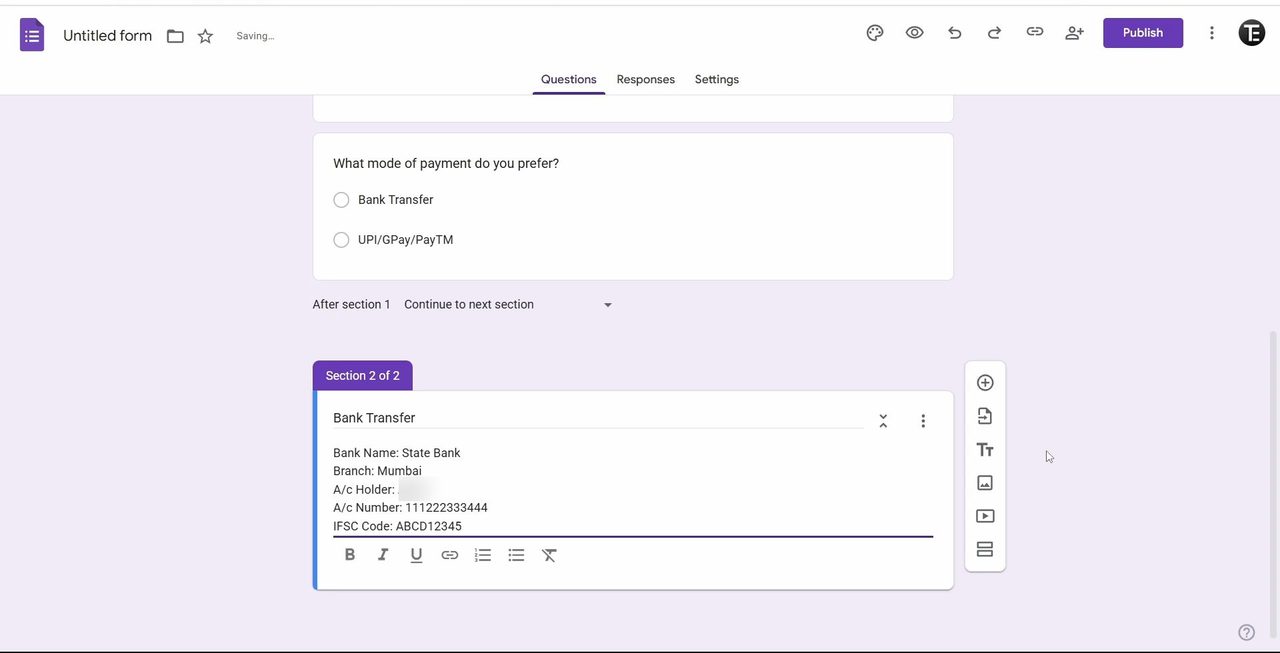
4Add a Bank Transfer section with your details
Each payment method gets its own section so people only see the details they need. Click the last icon in the right toolbar, Add section, and name the section Bank Transfer.
In the section description, paste your bank details: bank name, branch, account holder, account number and IFSC code.
5Add a Payment Proof file upload question
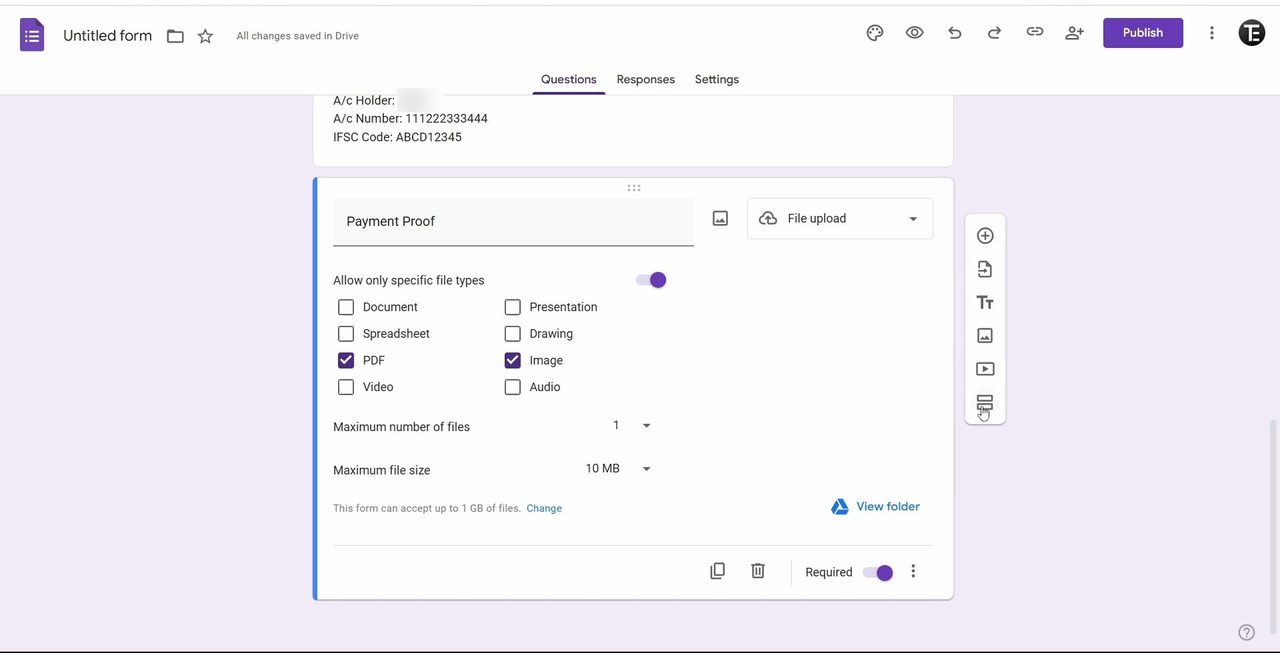
Click + to add a question in the Bank Transfer section, call it Payment Proof, and change the type to File upload (click Continue on the notice that appears). Turn on Allow only specific file types and tick PDF and Image. Then turn on Required. Uploaded files are saved to a folder in your Google Drive, which you can open from View folder.
6Add a UPI section with your QR code
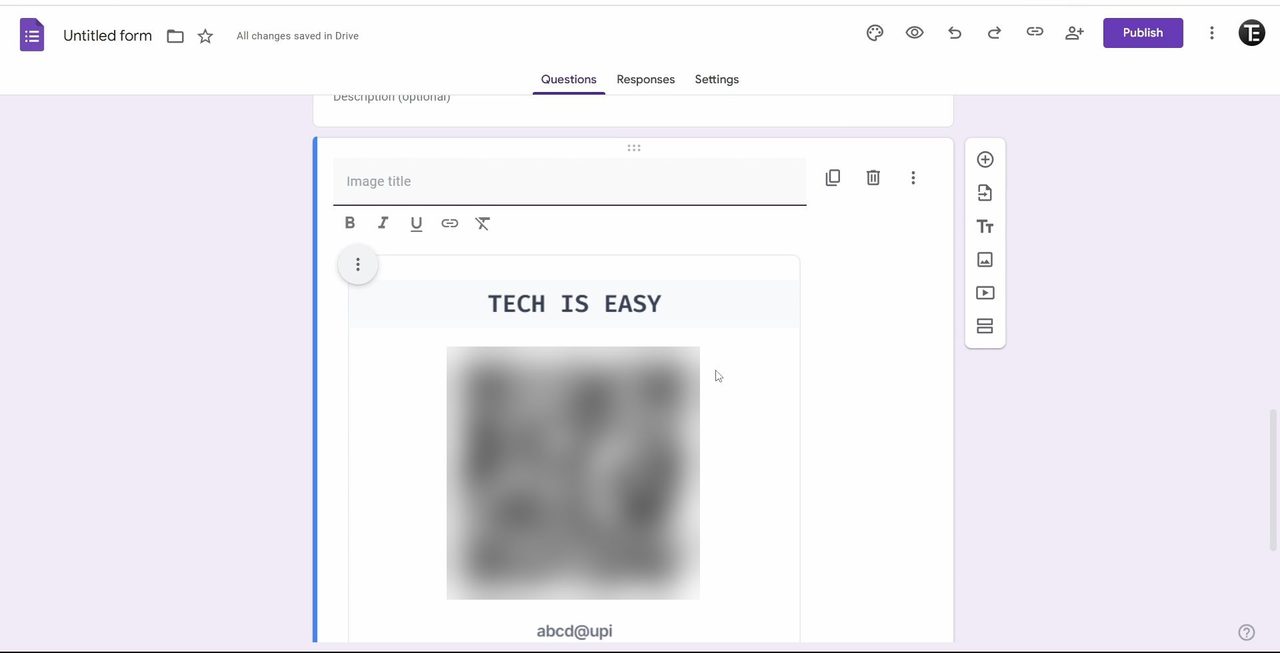
Click Add section again and name it UPI/GPay/PayTM. Click the Add image icon in the toolbar, then Browse to upload your QR code image from your computer. You can add an image title such as "Pay here".
7Add payment proof to the UPI section too
Repeat Step 5 inside the UPI section: add a Payment Proof question, set it to File upload, allow only PDF and Image, and make it Required. If you also want a Transaction ID, add a short answer question for it and make that required as well.
8Send each answer to the right section
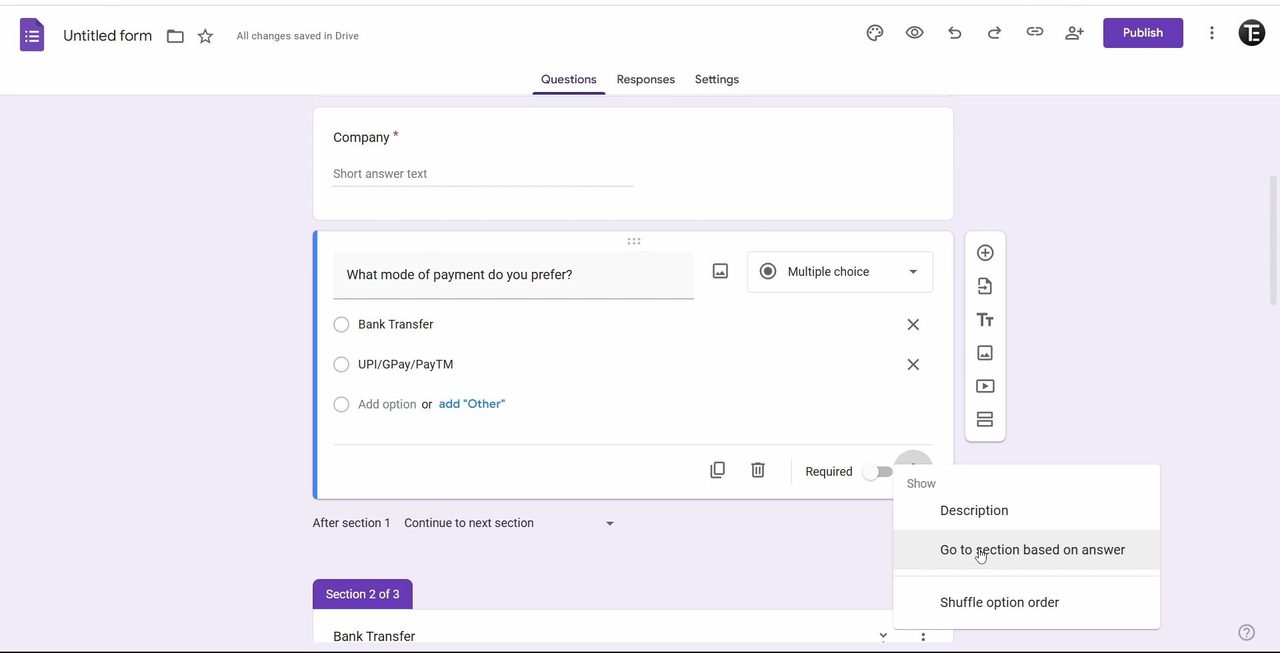
Scroll back to the payment method question and click it. Click the three dots at its bottom right and choose Go to section based on answer.
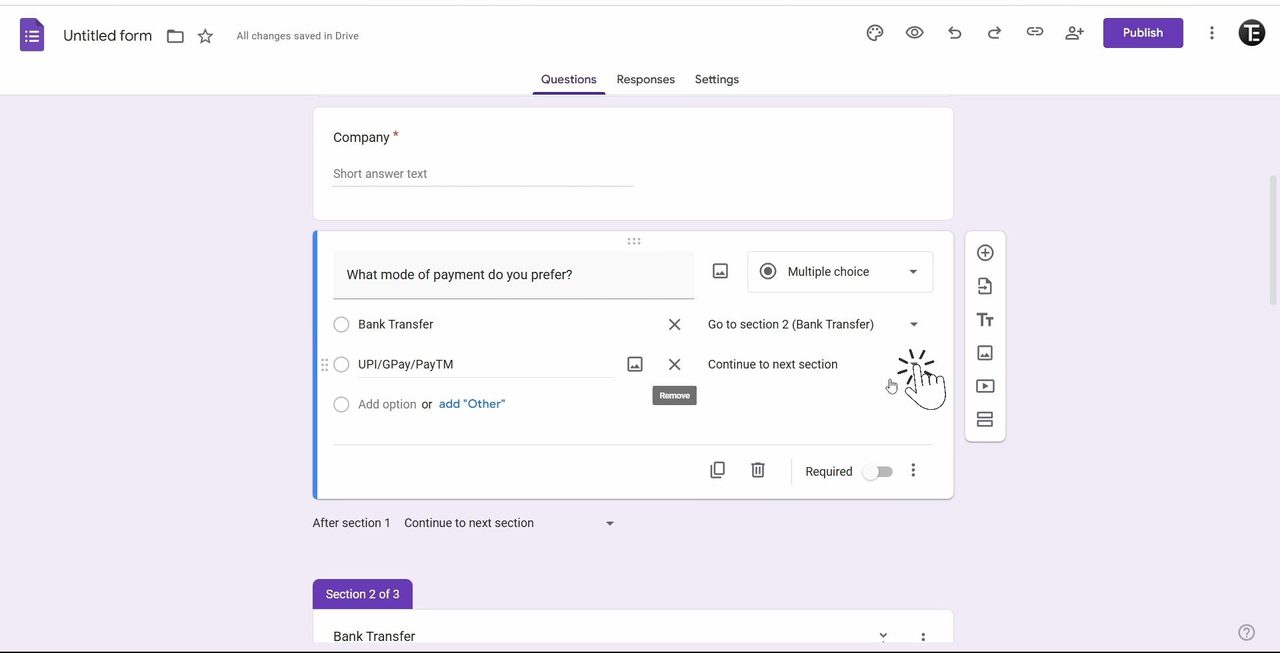
A dropdown appears next to each option. Set Bank Transfer to Go to section 2 (Bank Transfer) and UPI/GPay/PayTM to Go to section 3.
9Submit the form after the Bank Transfer section
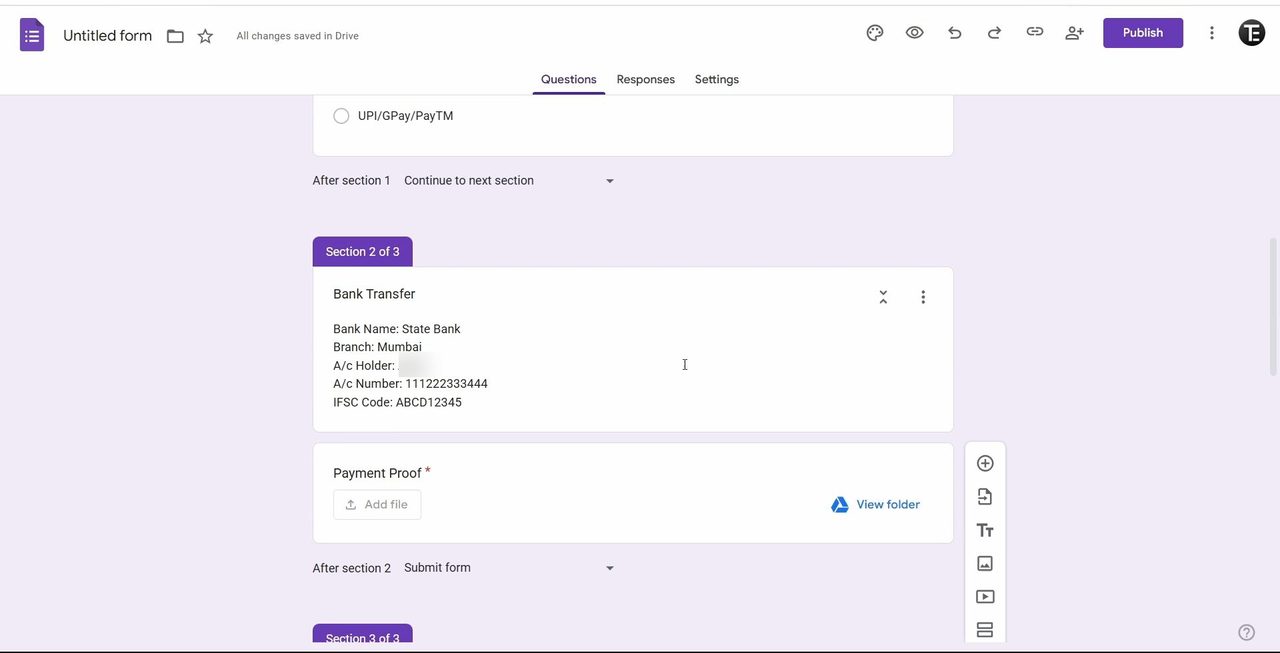
By default, Google Forms continues to the next section, so someone who paid by bank would land on the UPI section afterwards. Scroll down to After section 2, click the dropdown and choose Submit form. The UPI section is last, so it already ends the form.
10Preview and test both paths
Click the Preview (eye) icon at the top. Pick Bank Transfer, click Next, and you should see the bank details and the upload box. Go back, pick UPI/GPay/PayTM and you should land on the QR code page instead.
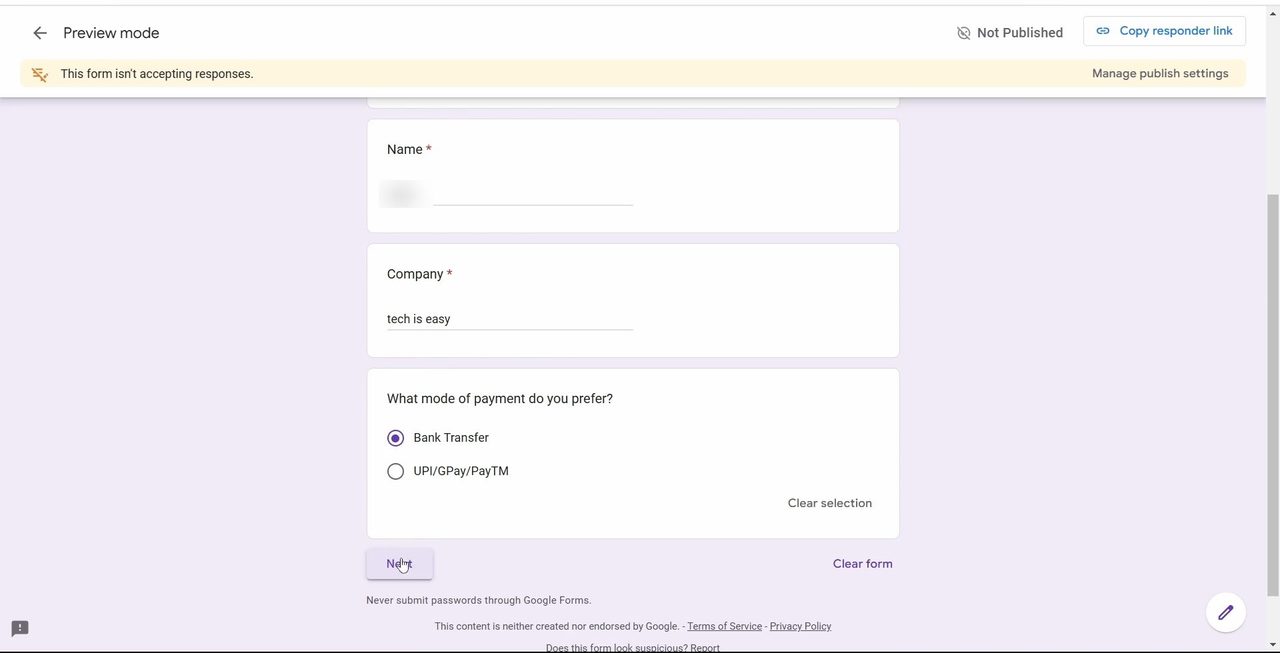
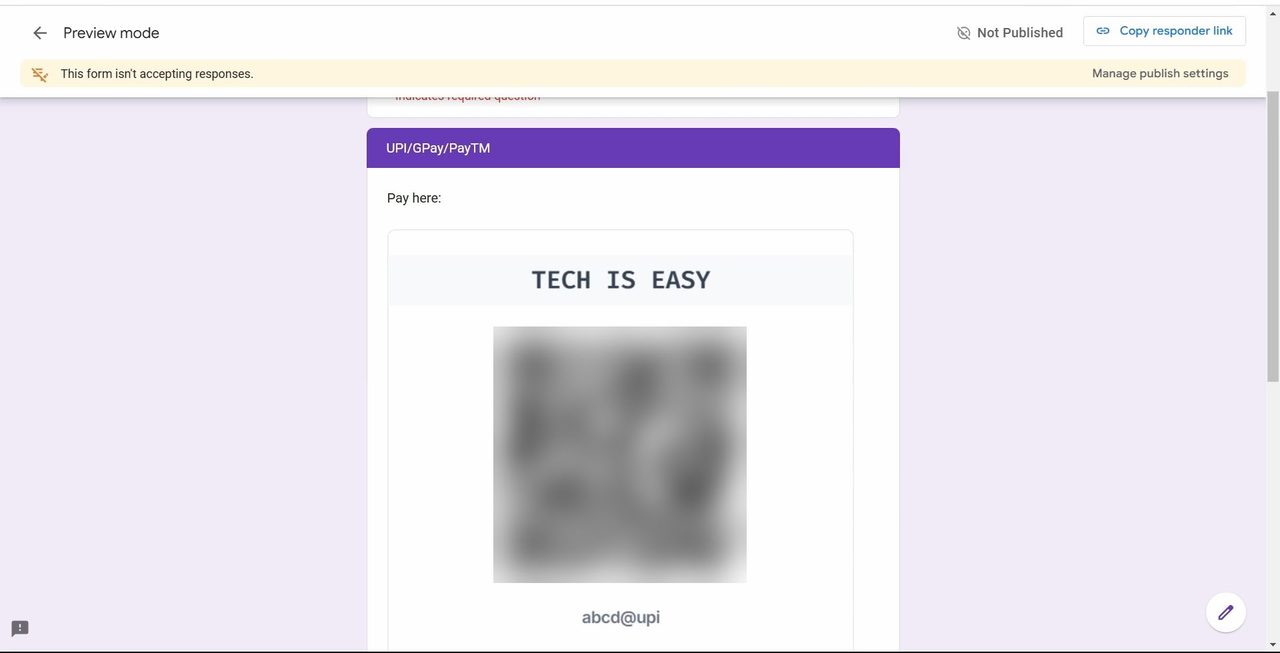
When everything works, click Publish so the form starts accepting responses. In our preview, the banner says "This form isn't accepting responses" until it is published.
Tips / troubleshooting
- People must sign in to upload proof. Google's question types help page says responders need to sign in to a Google Account to answer a File upload question. If many of your payers do not use Google accounts, ask for a Transaction ID in a short answer question instead.
- File upload is missing: Google lists two cases where you cannot use it: the form is stored in a shared drive, or your administrator turned on Data Loss Prevention. Move the form to My Drive or ask your admin.
- "Go to section based on answer" is missing: it only works on Multiple choice and Dropdown questions. Checkboxes do not have it. See Google's Show questions based on answers page, or our guide to conditional questions in Google Forms.
- Bank payers end up on the UPI page: you skipped Step 9. Set After section 2 to Submit form.
- Uploads fill your Drive. Files count toward the form owner's Google storage. Under the upload question you can set the maximum number of files and file size, and change the total limit for the form.
- Verify before confirming. A screenshot can be faked. Match each upload or transaction ID against your bank or UPI statement before you approve a registration.
FAQ
Can Google Forms accept payments directly?
No. Google Forms has no built-in payment gateway. This method shows your bank details or UPI QR code, people pay in their own app, and they upload proof in the form.
How do I add a UPI QR code in Google Forms?
Create a section for UPI, click the Add image icon in the side toolbar, and upload your QR code image. People scan it with any UPI app to pay.
Where do the payment screenshots go?
Into a folder in the form owner's Google Drive. Click View folder under the upload question, or check the Responses tab, where each upload is linked to its response.
How do I make payment proof required in Google Forms?
Turn on the Required toggle at the bottom of the File upload question. The form cannot be submitted until a file is uploaded.
Related guides